This is Round 1 of for the MechaStellar gameplay example using the Defend the City / Rampage game mode. If you want to read over game setup and army lists read this post here.
Note: MechaStellar is often a very lethal game so the longest Rounds are 1 & 2 while 3+ are typically much shorter since there are fewer units which you will see in this game as well as other examples.
To return to battlefield setup and army lists click here.
Round 1
In this module, regardless of points both players start with 7 Momentum.
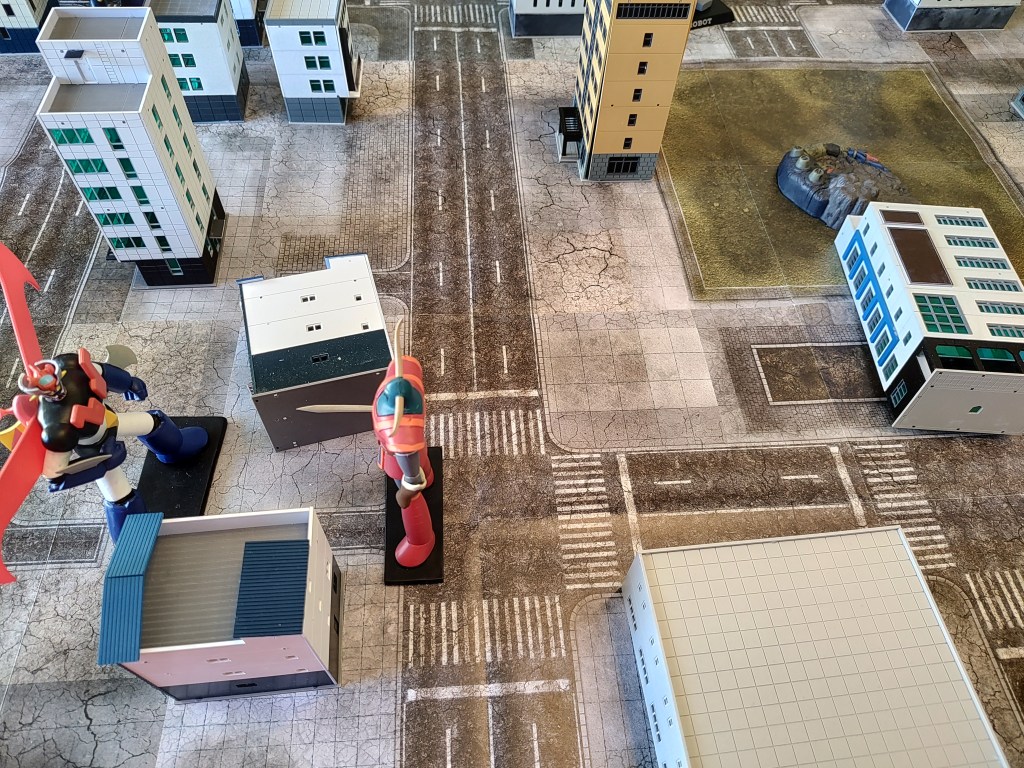
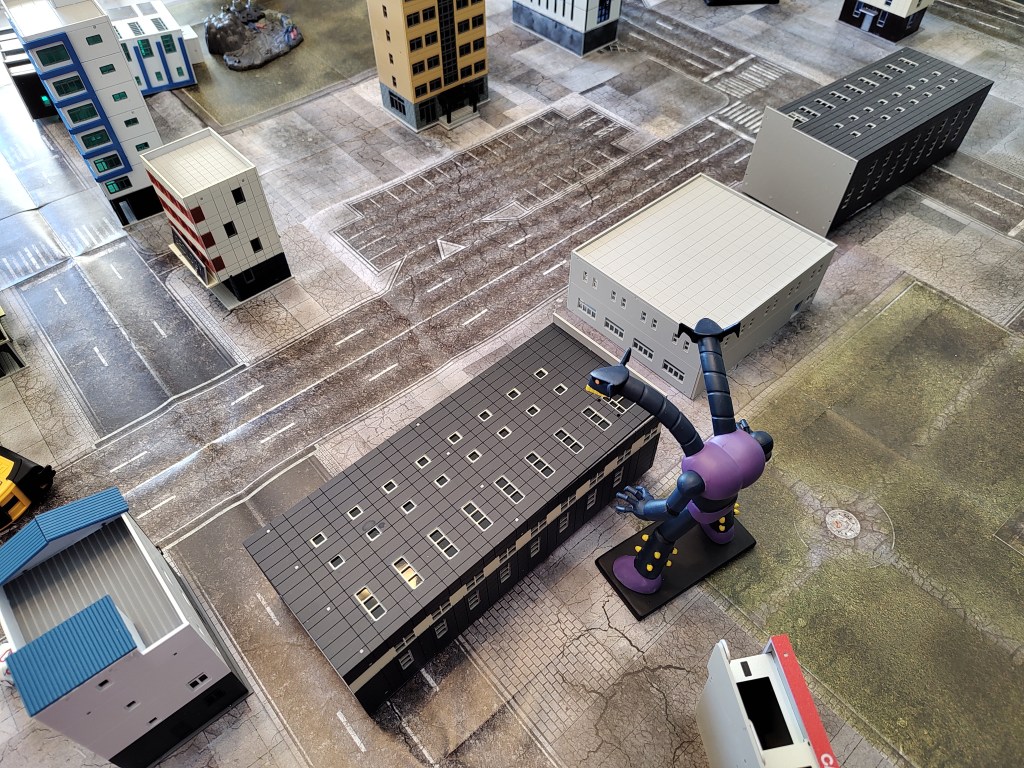
Kingdan is up first this Round. Like most units he has 1 Action he uses the Crash Through and Trample action to move through 2 buildings.
In the Destroy Terrain rules Crash Through forces the building to make 3 Saves and the target number is equal to 2x it’s damage. Since Crash Through is only DMG 200 for a Size 0 unit that means each building needs to roll a 4+. If any dice are less than that then the building is destroyed.
Crash Through
Building 1 rolls 3d10 and gets [1,3,6] since at least one die is below a 4+ it is destroyed. The 2nd Building is [1,1,1] and is destroyed as well. For destroying both buildings Kingdan gains 2 Momentum denoted as [M+2].
Now he moves into engagement range and attacks Mazinger Z in melee. He gains [M+1] for making a Melee attack while Mazinger gains [M+2] thanks to his Commander trait Galvanizing display.
Kingdan gains +2 Hits as the Attacker, while Mazinger chooses Guard for +2 Blocks. For basic units these bonuses are +1, but Level 1+ Pilots/Kaiju improve the offense bonus to while Level 2+ Ace Pilots/Unstoppable Kaiju improve the defensive / counter bonus to +2.
Since Kingdan wants to strike a Finishing Blow they split their Dice into ATK 6d10 DEF 4d10. Mazinger is unlikely to break through Kingdan’s defenses and so puts all their dice on DEF.
Kingdan gets a fantastic roll and scores 13 total hits while Mazinger gets 5 blocks. He burns [M-2] and takes 6 hits at 400 DMG each for 2400 DMG. Due to the strong armor from the Super Alloy Z Mazinger automatically passes the Armor Saves.
Since Mazinger did not deal damage back Kingdan strikes a Finishing Blow, it’s sword deals another 2000 DMG. Mazinger HP = 1400
In this module the attacker gains Momentum for destroying buildings while the Defender gains Momentum every turn they take damage. Mazinger gains [M+1] for taking DMG this turn.
A unit can rotate their unit up to 90 degrees on their turn, Kingdan is doing so at the end of their turn which is helpful for preventing Blindside attacks.
End of Turn Momentum abbreviated as EOT [M]
- Kikaiju 10
- Toezinger 8

Mazinger is up next, his Hot Blooded trait gives him +1 Hit this turn when he activates due to Return Fire. His renowned pilot trait gives him the option of [M+1] or a Focus action, he chooses the Focus action.
Mazinger is going to start by shooting Kingdan. Normally, to shoot while in melee you must burn a Focus action, the exception is Range 8″ weapons and the Toei version of Mazinger has two of those.
As the Attacker Mazinger can choose between Precision (+Accuracy) or Barrage (+Shots). He will choose +2 ACC on each of their attacks, Kingdan will choose Dodge (+2 Evade) since it will combo well with his Commander trait that allows him to reroll up to three Evade dice any time they are attacked.
While you can choose Precision (+ACC) or Barrage (+Shots) for each attack, in this particular case Mazinger will always want the accuracy since Kingdan has a strong Evade. There is a case to be made for using barrage with target lock and go fishing for crits, but since Kingdan can reroll up to three Evade dice it’s not a great strategy.
- With Accuracy of 9+2 vs Evade of 2+2, Kingdan needs a 7+ to Evade each shot.
- Freezing Beam 8″ = 3 Hits and is negated by Kingdan losing [M-3]
- Rust Hurricane 8″ = 4 Hits and 1 failed save which is negated by [M-1]
- Level 1+ Pilots and Kaiju (but not Ship Captains) can burn [M-1] to negate a failed Armor Save, this way your favorite pilots can avoid dying an unlucky death early on.
Mazinger now uses the Disengage skill. It costs [M-1] normally and another [M-1] if you want to attack afterwards, which Mazinger does. Additionally, Kingdan has the Merciless Melee trait which increase the cost by 1 more. Overall it costs Mazinger [M-3] to disengage.
Now for a Rocket Punch. Super Robots have a Power stat which they can use to enhance their attacks, Mazinger chooses DMG+100.
- Rocket Punch = 5 Hits for 2500 DMG.
- Kingdan HP 4100/7000
- Current [M] Kikaiju 6 Toeizinger 5
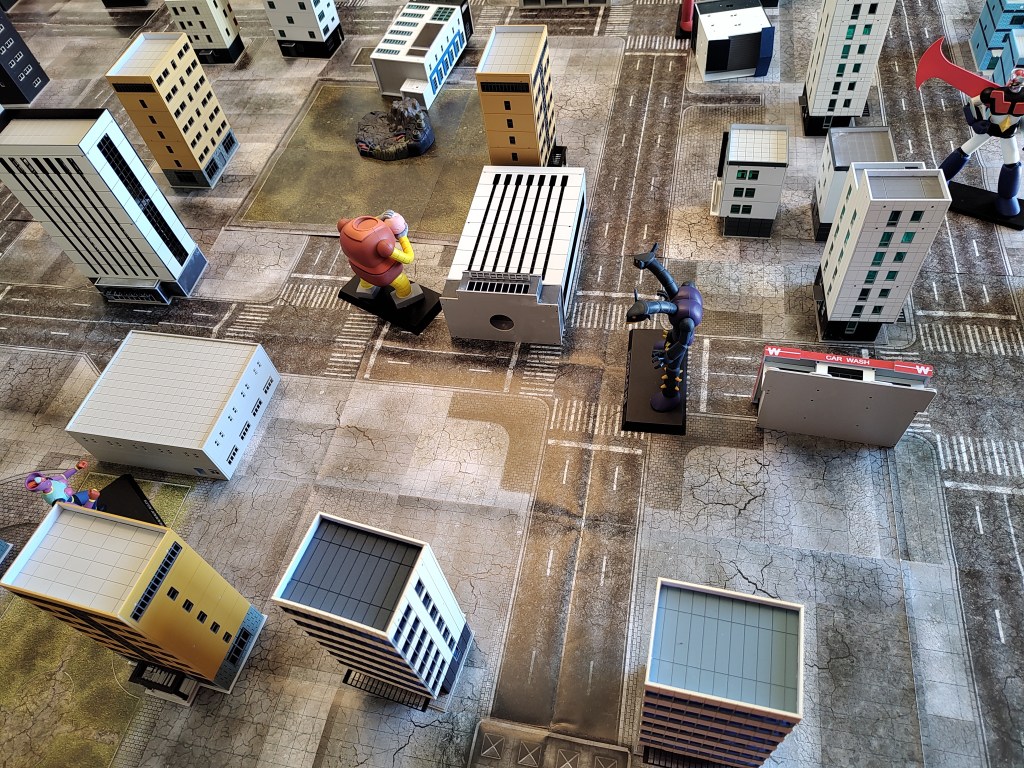
While it might be better to go for the kill, Mazinger’s player decides to go engage Doublas M2 instead. This has two advantages. One is that the Return Fire rule forces her opponent to activate Doublas next, this way Garada can’t go next and blitz Diana A. Secondarly, it forces Doublas to waste a Focus action to shoot in melee or burn [M-2] to disengage.
Mazinger moves just outside engagement range and uses Breast Fire.
- Mazinger chooses Barrage (+2 Shots) while Doublas picks Block (+1 Block)
- Shooting 9 vs Evade+1 Doublas needs an 8+ to evade each shot
- Breast Fire 10 Hits vs 1 Block = 2700 DMG
- Double passes all his Armor Saves luckily
Now Mazinger moves into Melee.
- [M+1] for attacking in melee
- Focus action for +1 Hit
- Mazinger gets +2 Hits as the Attacker, Doublas chooses Guard (+1 Block)
- Mazinger melee gets 7 Hits vs 1 Block
- 6 Hits deal 1800 DMG
- Doublas fails 2 Armor Saves vs the Push weapon
- It is knocked back 3″ for each Armor Save forcing it out of melee engagement range
- It also takes a Finishing Blow for 1000 DMG
- Doublas HP 1500/7000
The attacker chooses the knockback direction and sends Doublas M2 reeling backwards down the mainstreet avoiding any collateral damage to buildings. The downside is that Doublas is no longer stuck in melee.
Koji’s Hot Blooded trait gives him [M+1] for engaging an enemy or ending his turn 5″ closer to an enemy. Koji engaged two enemies this turn and moved closer but still only gains [M+1].
- EOT [M] Kikaiju 6 Toeizinger 7
Doublas M2 is up next.
- First a melee smash into the nearby gas station
- Melee is treated as 2x DMG for destroying terrain so DMG 300 means the terrain needs a 6+ on three dice
- 3d10 = [1,5,8] the terrain is destroyed [M+1]
- The Defender joked they should have been using the Dangerous Terrain module so Doublas would have to soak up a fireball afterwards.
Now Doublas uses Full Throttle to move forward to get in rapid fire range of Boss Borot. Kaiju have a Havoc stat that lets them have various abilities including Collateral Damage. This ability let’s Doublas make a bonus direct attack against Cover before attacking the target behind it with each attack they make this turn.
- First attack is DMG 300 so the building has to roll 3d10 and needs a 3+ on each to survive
- 3d10 = [2,4,8] the building is destroyed [M+1]
- Doublas chooses Precision (+1 ACC) while Boss chooses Dodge (+1 Evade)
- Boss needs a 7+ to Evade
- Doublas Heat ray makes 5 Hits, Boss’ cover would have given 2 Blocks had it survived.
- Boss takes 1500 DMG and loses [M-1] to pass a failed Armor Save
- Boss gains [M+1] for taking DMG this turn
For it’s second attack Doublas’ player considers attacking Venus A to blow up her cover as well, but then realizes if they do so it will let the defending player the option to activate Venus A next so he declines. He could shoot Koji, but then Galvanizing Display would give them [M+2].
- Doublas Heat ray makes 7 Hits
- Boss takes 2100 DMG and [M-1] to pass a failed Armor Save
- Boss takes 1500 DMG and loses [M-1] to pass a failed Armor Save
- Boss HP 3200/7200
- EOT [M] Kikaiju 8 Toeiziner 6
Boss Borot activates and uses Unwavering Loyalty for [M+2] since he’s below 50% HP.
He uses Idiot Savant and rolls a [5] to gain Move+4″ and Fly this turn. Unfortunately both Garada and Doublas are outside of his range this Turn. Had he rolled high he could have gained the option to steal a weapon from either of them if he moved close enough after the roll.
Boss has to choose between attacking the Doublas M2 that’s already gone, or setting up a screen to protect Venus A from the soon to attack Garada K7.
- He decides to use the Throw Terrain action to throw the rubble of the now destroyed building at Doublas
- Boss chooses Precision (+1 ACC) vs Dodge (+1 Evade) Doublas Evades on a 4+
- Thanks to a lucky crit Doublas is hit twice for 400 DMG.
- Boss Borot then spins 90 and uses his enhanced movement to protect Venus A.
- EOT [M] Kikaiju 8 Toeizinger 8

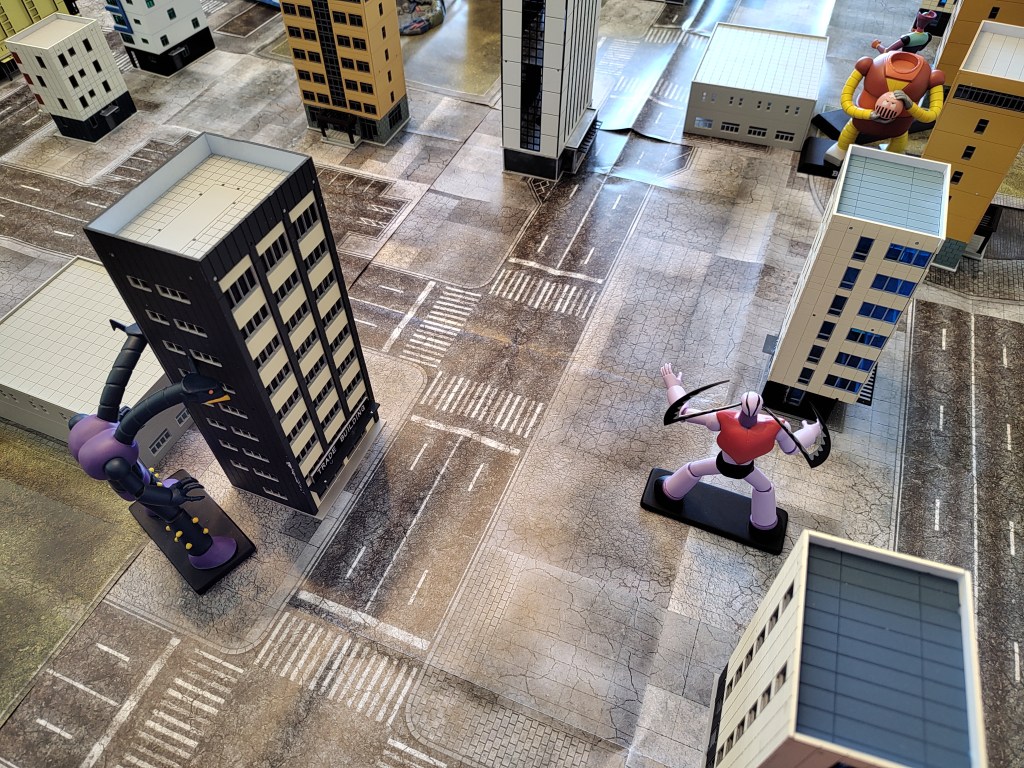
Garada K7 is up next, while he can’t melee Venus A he can throw his horn at her.
- He uses Havoc for +1 Hit this turn and +1 ARM PEN with push pull weapons.
- He uses Barrage (+1 Shot) on his bladed horns while Venus A uses Guard (+2 Blocks)
- Shooting Accuracy 8 vs Evade+2 Venus A need a 6+
- DianaA uses Improvise which allows you to reroll dice on evade or melee.
- Afterwards there are 4 hits for 1600 DMG.
- Diana A gains [M+1] for taking DMG this turn
Now for melee with Boss Borot
- Garada gets [M+1] for attacking in melee
- Garada gets +1 Hit while Boss Borot chooses Counter for+1 Hit.
- Garada goes all in on Attack for 8d10 Melee dice and uses his Smash [CC] attack for knockback.
Boss Borot realizes a potential blunder. If he gets hit by that Push weapon and fails the Armor Save he’s getting knocked either into a building or Venus A. While that would be very classic of the Toei Mazinger show, he wants to avoid the tactical blunder this turn.
- Boss uses his Incredible Luck ability for +4 Blocks.
- Boss Borot puts 4d10 on DEF and 1d10 on ATK
- Garada gets 8 Hits vs Boss very lucky 8 Blocks
- Boss counters with 3 Hits
- Garada loses [M-3] rather than suffer the embarrassment of Boss Borot getting a finishing blow on him.
- EOT [M] Kikaiju 6 Toeizinger 9
The players joke that Garada went to eviscerate Boss Borot, Boss Nuke and Mucha all close their eyes and recoil in terror but nothing happens, as they open their eyes they see Garada got his horns stuck in the adjacent high rise building, talk about incredibly lucky.
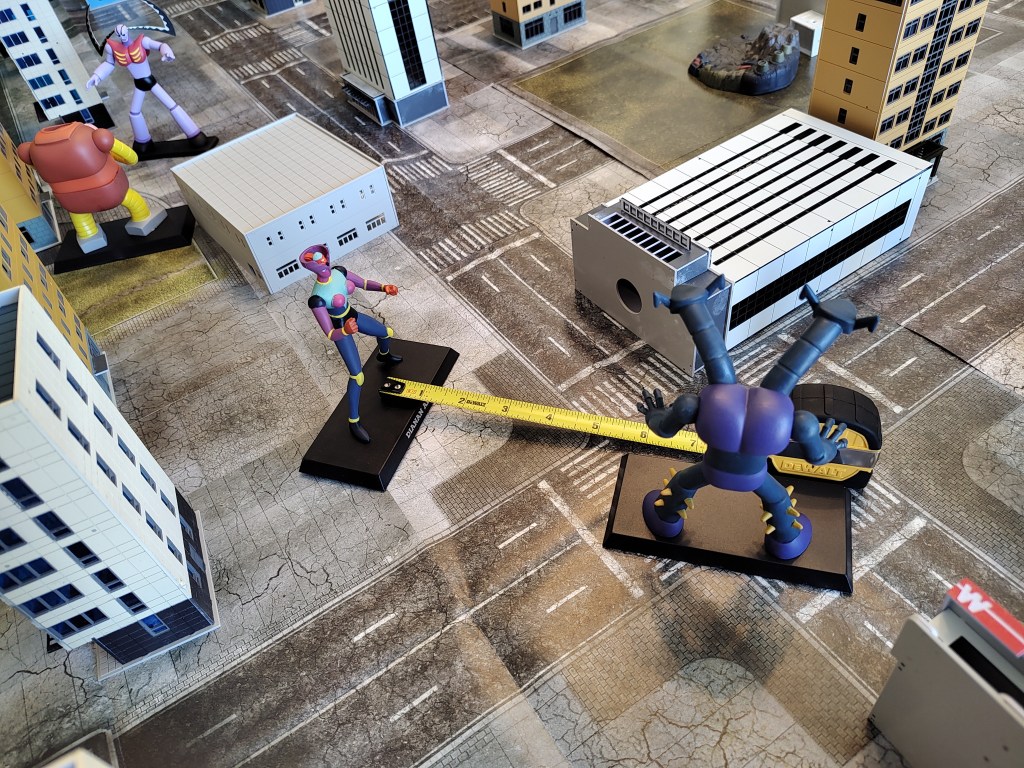
Diana A is up next, thanks to Hot Blooded she gets +1 Hit this turn due to activating from Return Fire.
She moves forward to get Doublas M2 within Sensor range for Target Lock and then lets loose the photon energy missiles.
- She chooses Barrage (+3 Shots thanks to Gunnery Expert) while Doublas chooses Dodge (Evade +1)
- Shooting 8 vs Evade+2 he needs a 6+ to evade
- Doublas is Hit 9 times
- Even with Momentum that’s enough to finish off Doublas M2. [M+1]
- Destroying a unit this early is worth double VP.
Now Sayaka is torn between helping Koji and shooting Kingdan, or helping Boss (and herself) by shooting the closer Garada K7. In classic Toei fashion she chooses to ignore Boss (and his unrequited love) and help Koji while Boss blubbers on.
- She has 2 actions left and chooses to use 1 to Focus (+1 Hits) and 1 to fire the Scarlet beam at Kingdan.
- She chooses Precision (+3 ACC) while Kingdan chooses Dodge (Evade+2)
- Shooting Accuracy 11 vs Evade+4, Kingdan needs a 7+ to evade
- The scarlett beam gets 6 Hits vs Kingdan
- Cover blocks 2 Hits
- Since Cover blocked a hit we roll a single d10 on a 4+ it survives
- d10 = [1] Sayaka destroys the cover giving her enemies [M+1] whoops
- Kingdan then loses [M-4] rather than take the DMG or the Armor Saves.
- EOT [M] Kikaiju 3 Toeizinger 10
Saya’s Hot Blooded trait would have given her [M+1] but they are already at the cap of 10.
Last up this Round is the 2nd Doublas M2, also known as the Double Doublas. Time to recoup some Momentum!
- Melee to a nearby buildings with DMG 300
- 3d10 = [2,8,9] destroyed [M+1]
As for shooting, since Boss Borot is in melee he’s not a valid target and Venus A is unfortunately too far away too target (props to the player for moving her just outside of range)
- So Doublas uses 1 Havoc for +100 DMG with Crash through bringing the DMG up to 300.
- Crash through is treated as 2x DMG for destroying terrain so now the buildings need a 6+ to survive
- Doublas crashes through two buildings the first one is [6,9,9] and survives while the second one is [2,4,9] and is destroyed for [M+1].
- EOT [M] Kikaiju 5 Toeizinger 10

2 thoughts on “MechaStellar Gameplay Example – Defend the City – Round 1”