
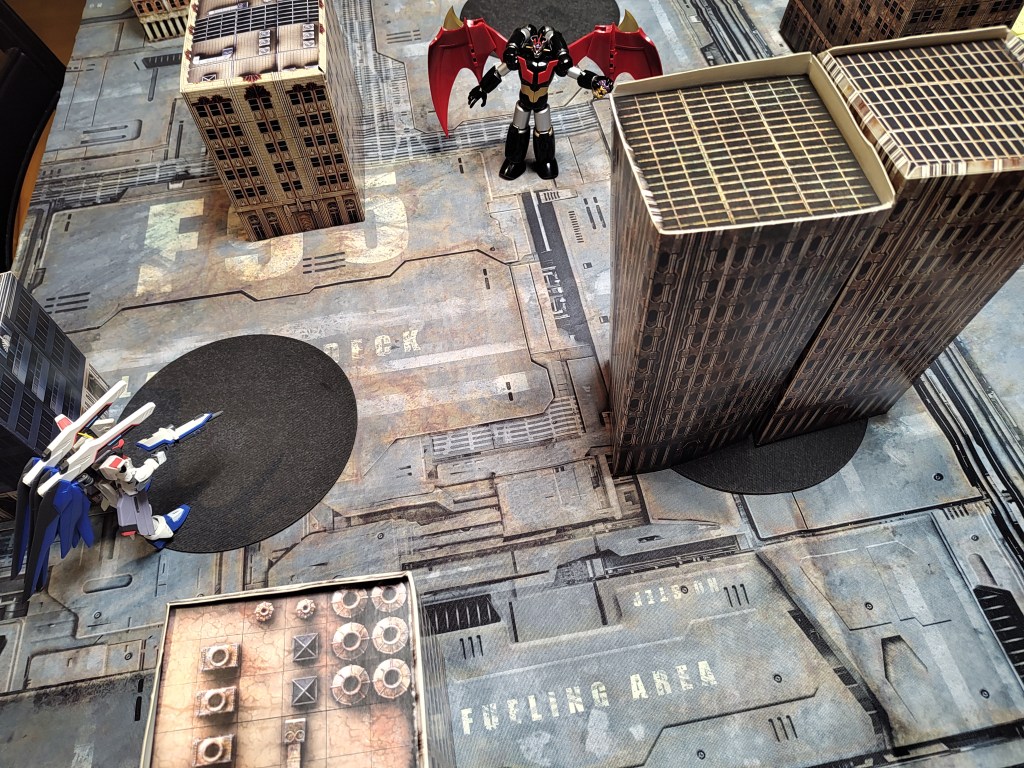
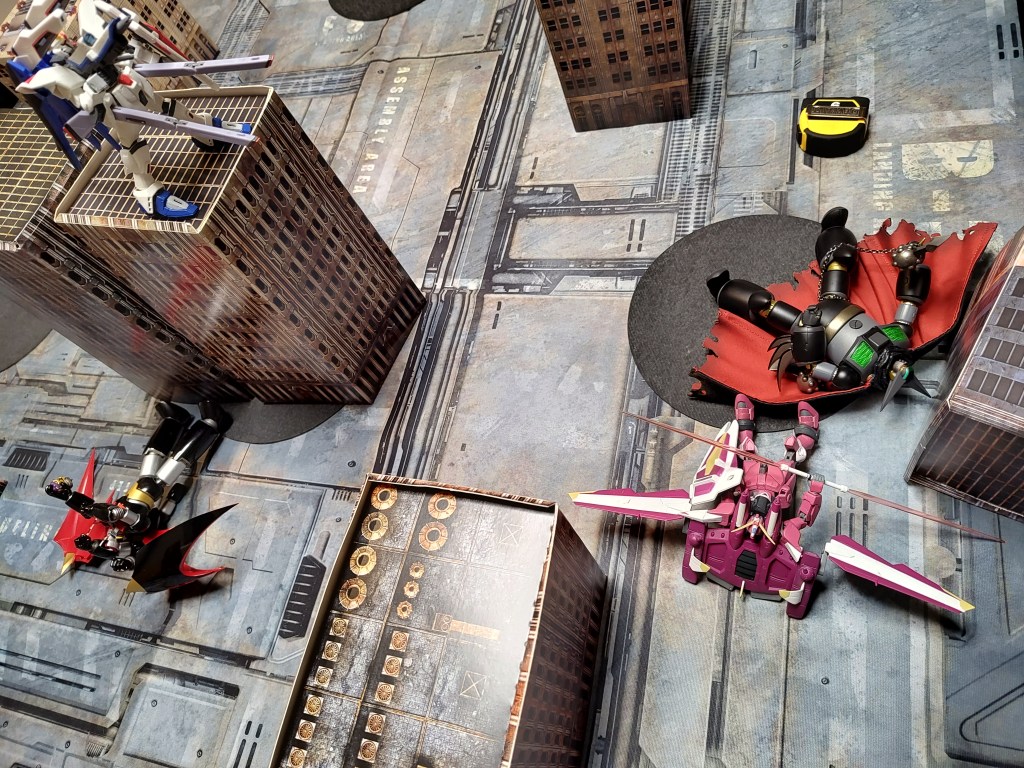
In this battle report we have a 2000pt game using the MechaStellar VER10 rules, one side we have the SEED Duo of Kira and Athrun piloting the Freedom and Justice Gundams. On the other side we the iconic Koji Kabuto in the Mazinger Z with the God Scrander as well as the OG Getter Team of Ryoma, Hyato and Musashi in Getter Robo. (We’re using the Armageddon Black version since we’ve customized this 300pt unit into a 1010 point unit.)
In this cross universe game, the SEED Duo are facing off against two of the most iconic Super Robots. Read on below the break to see the results of the battle report.
Forces

Gundam SEED
- Justice Gundam (1000pts) – Commander
- Freedom Gundam (1000pts)
GetterZinger
- Shin Mazinger (990pts) – Commander
- +100pts Furious Fusillade (Barrage is +3 dice)
- +100pts Persist Level 2 – Free Iron Wall Skill twice per game
- +30pts Desperation Attack (Bonus effect for [CC] weapons)
- +10pts Awe Inspiring Arrival (+1 DEF in Round 1)
- Getter Robo (1010pts)
- +50pts Getter Gatling
- +50pts Performance Upgrade (+2)
- +100pts Morale 3++
- +50pts Power+1
- +100pts Persist Level 2 – Free Iron Wall skill twice per game
- +100pts Fearless Level – Free use of Valor skill twice per game
- +50pts Merciless Melee
- +50pts Melee Expert (Improve Melee bonus by +1)
- +50pts Lone Wolf (Use Guard & Dodge, cannot benefit from Support ATK/DEF
- +50pts Guard Expert (Guard is +2 dice)
- +50pts Elusive (Dodge is 8++)
- +10pts Awe Inspiring Arrival (+1 DEF in Round 1)
Note: Some of the rules and points used may be out of date as you’re reading this battle report.
Game 1 – Round 1
Kira in the Freedom is up first, captures a control point. We start with a HiMats barrage for the railguns and plasma cannons against Shin Mazinger Z. The SEED player is a little surprised since they aren’t used to having a target with such high defenses.
Outside of Rapid Fire range, Mazinger Z takes no damage =X
Koji charges forward heedless of the danger, he uses the Photon Beam with Valor, Kira uses Flash. Kira goes for a no-penalty counter thanks to Flash but his beam rifle fails to scratch the paint on Mazinger.
With the recent change to up defense both players are little surprised that they’re getting 0 hits through. We’re going to have to adjust strategy.
Speaking of strategy, Athrun the more tactically minded of the two takes the high ground and hammers Mazinger Z with his beam cannons and beam boomerang causing a decent chunk of damage thanks two failed Armor Saves.
Too far away for melee, Ryoma in the Getter-1 elects to use the Getter Gatling built by the eccentric Professor Shikishima. Justice used it’s boost to get on top the building and has no rerolls left on defense. The Getter Gatling in rapid fire range with barrage and Valor scores 12 unblocked hits.
It also scores 8 Finishing Blows.
At this point the devs get into a spirited discussion something along the lines of “I have Phase Shift!!!” versus “Should have believed in Getter huh?”
The discussion then focuses around Iron Wall. One side thinks that if Iron Wall were adjusted, it could prevent crazy swing damage like this. The other side thinks, “we just upgraded Iron Wall, do we really want to make it even better than it currently is?”
Well, one way to find out.
Rematch Game – Round 1
Athrun is up first, he captures a Control Point and uses Accelerate to maximize the distance between him and Mazinger Z.
Koji pushes forward and unloads with a rocket punch dealing 1000 DMG to Justice thanks to the Blindside effect but resisted by Phase Shift.

Kira takes the control point on the other flank. He nails Mazinger with his Railguns for 1500 DMG. He also is behind Mazinger’s rear arc, setting him up for a Blindside attack next Round.
Koji could have used Counter to attack Freedom, gaining a free-spin but elects not to.
This time the team started off with Getter 3 who launches a missile barrage into Justice causing minor damage. CHANGE GETTER 1, SWITCH ON. Getter 1 flies forward, throws a tomahawk boomerang which Justice nimbly dodges.
Getter finally gets into a melee brawl with Justice. The two are fairly evenly matched, Getter goes for Decisive strike since he doesn’t want to give Athrun a chance at a free counter. Athrun makes use of the Iron Wall skill to avoid getting wrecked by the Getter Tomahawk.
Round 2

Shin Mazinger Z with the God Scrander takes too the skies and claims the high ground in order to annhilate Freedom.
Although we underestimated the weight of CHOGOKIN Z. The players apply the “wobbly model syndrome” rule and put Mazinger on the ground level but remember that he’s actually on top the building.

Freedom survives the BREASTO FIYAA attack but take considerable damage, and counters with its beam rifle.

God Scrander unleashes multiple rocket punches. Thankfully, Kira is in SEED mode while below 50% HP and manages to avoid getting pummeled off the board.
Kira takes the enemy home control point and unloads on Mazinger with a Hi-Mats. Koji uses Iron Wall twice and easily survives.

Speaking of survival. Getter 1 goes for a Decisive Strike again on Justice. Getter gets lucky on the attack roll with a boat load of critical hits. Athrun’s decent on the defense roll but there’s enough unblocked hits that he opts for Iron Wall, which is great because Getter gets lucky on Finishing Blow. The new improved Iron Wall reduces damage and for Aces it also reduces damage on Armor Saves and Finishing Blow. Justice survives with 200 HP.
Getter then uses Zeal, Power Attack and proceeds to cleave through Justice.
Round 3

It’s 1v2 and Freedom is already pretty bad off. Oh and Shin Mazinger is up first. Earlier, Kira used his pilot trait to regain HP, but rolled so well he was no longer in SEED mode, but Athrun dying fixed that. Another high ground barrage on Freedom, but thanks to the Iron Wall skill even with excessive hits Freedom survives.
Kira’s turn. SEED mode plus a lucky railgun shot (8 dice and all 8 dice were crits, and 2 Finishing Blows as a bonus) which completely pulverizes Mazinger Z.

Kira then uses Boost to get on top the high ground, and Hi-Mats to do a Freedom full burst on Getter.
Lone Wolf + Elusive + Guard Expert + Iron Wall go a long way towards stopping the beam rifle and plasma cannon, but the railgun ekes out just enough damage to take down Getter.
“Should have believed in Getter” chirps the SEED player
Total Freedom Victory.
After Action Report
Getter Mazinger Player
Well, I stand corrected. At first I didn’t think it would be a good idea to let the player choose Iron Wall after failing Armor Saves / Finishing Blow, but I think this change is definitely for the better and it really improves quality of life. Both for myself and the Gundam player the safety net of having Iron Wall really made the game feel a lot smoother.
Overall I’m a fan, even though I lost. I saw with Getter and Justice that even if it’s after the fact, it’s still very possible to burst through strong defenses and defeat a unit using Iron Wall.
Gundam SEED Player
The first game was an absolute shut out, but the Iron Wall change would have prevented that. Well, maybe not, that was an insane Finishing Blow roll, I’d have to double check the math lol. Either way I really like the change to Iron Wall, in the past it wasn’t used very often but now I think it’s a strong contender with Flash.
Overall Freedom and Justice are a fun pair to use, the high movement speeds and big weapon loadouts are fun, although I still haven’t had a chance to use the Fatum blindside backpack against a Super Robot yet. Maybe next time!
