Happy New Year! This battle was our favorite of the year.
Here’s a 1500pt battle report using the MechaStellar VER9.3 Core Rules featuring Amuro and Casval piloting the RX-78-2 Gundam’s with Kai and Hayato in Guncannons for support on one side and Mazinger, Getter Robo (Musashi solo) and Combattler V on the other side.
We like to setup a quick narrative for these games so for this one we have a combined SRW style universe. In space Amuro and Sayla successfully convinced Char to join their cause and promote the ideals of Zeon Zum Deikun as his rightful heir Casval Rem Deikun.
Unfortunately, while they were busy in space, the nefarious Hyakki empire on Earth managed to mind-wipe and control the pilots of Mazinger, Combattler V and Getter Robo. (In this case, only Musashi as Ryoma is still badly injured from the battle with Moba and Hayato is MIA)
Army Roster (1500pt)
On the Red Comet side we have
- Casval’s Gundam with Magnet Coating 500pts
- Commander Trait – Three Times as Fast
- Amuro’s Gundam with Magnet Coating 550pts
- Kai’s Guncannon (with Gunnery Expert swapped in as a Pilot Trait) 250pts
- Hayato’s Guncannon 200pts
On the Super Robot side we have
- Musashi’s Getter-1 (Solo) 500pts
- Commander Trait – Three Times as Fast
- Mazinger Z (Toei) 500pts
- Combattler V 500pts
The Super Robot player chose Musashi as their Commander since it’s a bit out of turn for Char to pilot the Gundam and also fairly rare for Musashi to pilot the Getter Alone. He mirrored the other team by also choosing Three Times as Fast as the Commander trait, the Evade rerolls will be very helpful since Musashi is only a Skilled Pilot.
The players are also using Ace Evade (+3 Evade) instead of Flawless Ace Evade (auto-dodge) for this battle.
Round 1
Combattler V has a 5 man pilot team and so chooses 2 Pilots to be active each Round. This Round it gains the benefits of Juuzo (Marskman) + Daisaku (Powerhouse)
(Abbreviations: MIC = Make it Count Pilot Skill. IDF = Indirect Fire. EM = Electro-Magnetic. LOS = Line of Sight. VP = Victory Points. EOR = End of Round.)
Key concepts.
- Momentum [M] is used to protect your units, improve the Evade of Aces, or to pass a failed Armor Save. If two Momentum is lost it will be denoted as [M-2].
- Shooting – Enemies roll Evade to avoid your shots. A roll of 1 is a Critical Hit and worth 2 hits. A roll of 10 always Evades.
- Target Lock – When the target is within Sensors range 1s and 2s are Critical Hits on Evade.
- Rapid Fire – When a weapon is within half range it often gains bonus attacks. For instance a Bazooka makes 3 shots, but gains a bonus +1 shot in Rapid Fire range.
- Melee – you and your opponent split your melee dice pools into attack and defense. If the defender survives they get to counterattack. Every 5+ on a d10 is a Hit or Block, every 10 on Attack is a Critical Hit worth 2 Hits.
- Armor Saves – Some weapons like a beam saber have a chance to deal catastrophic damage, the target rolls an Armor Save vs the weapons Armor Penetration (PEN). Each failed Save does 1000 DMG.
- Revenge – When a unit with an exceptional pilot dies one of your units may declare Revenge on the attacker granting bonus hits, and bonus VP if they are destroyed.
- Power – Super Robots have a Power Stat they can use to improve DMG or PEN
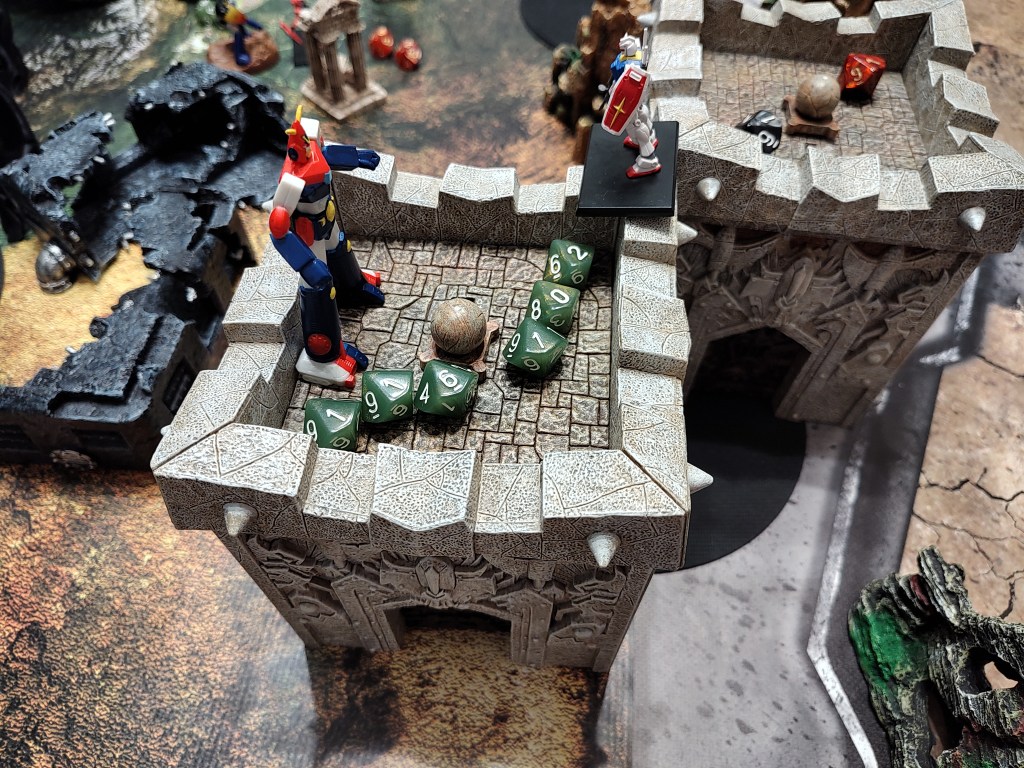
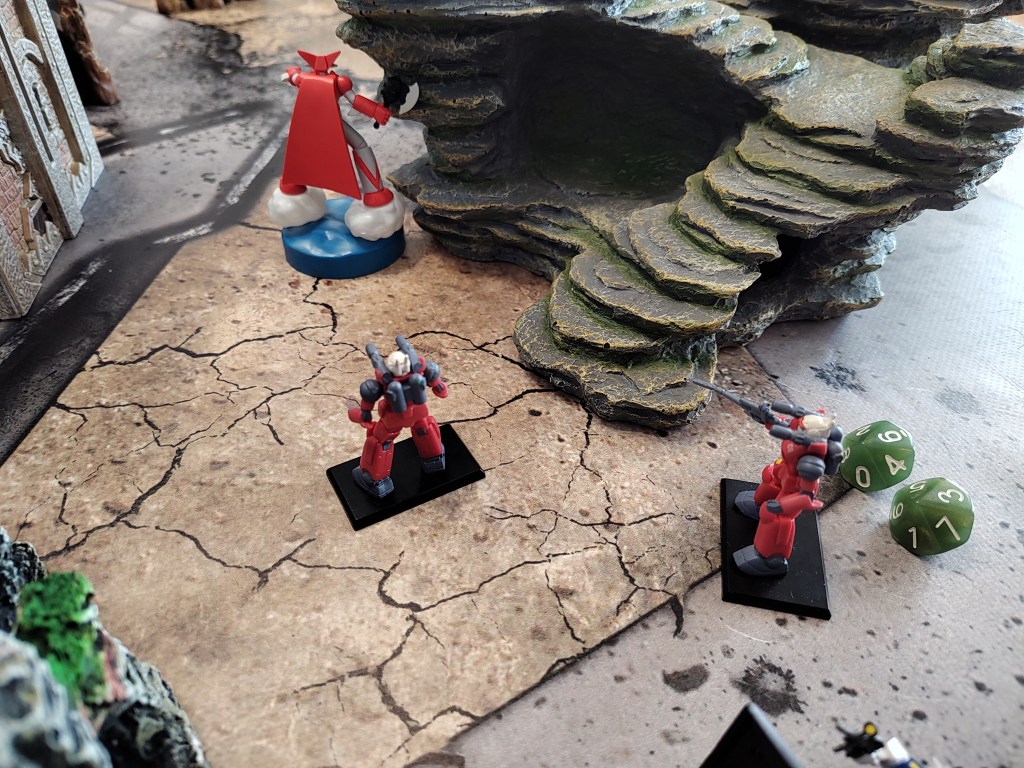
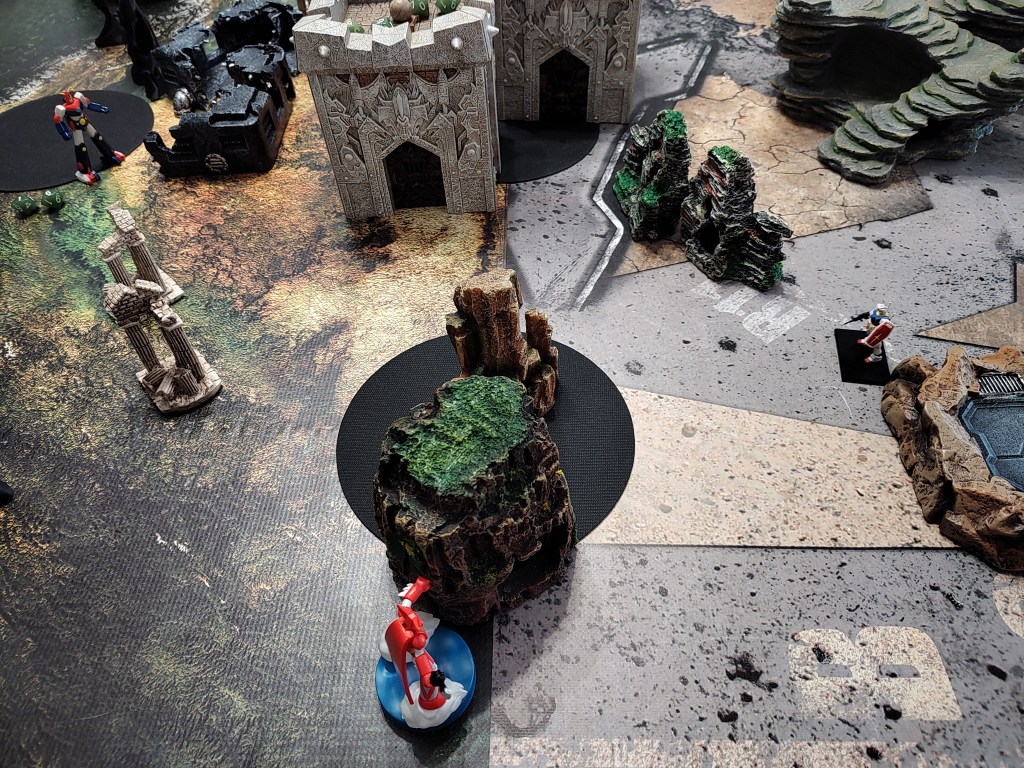
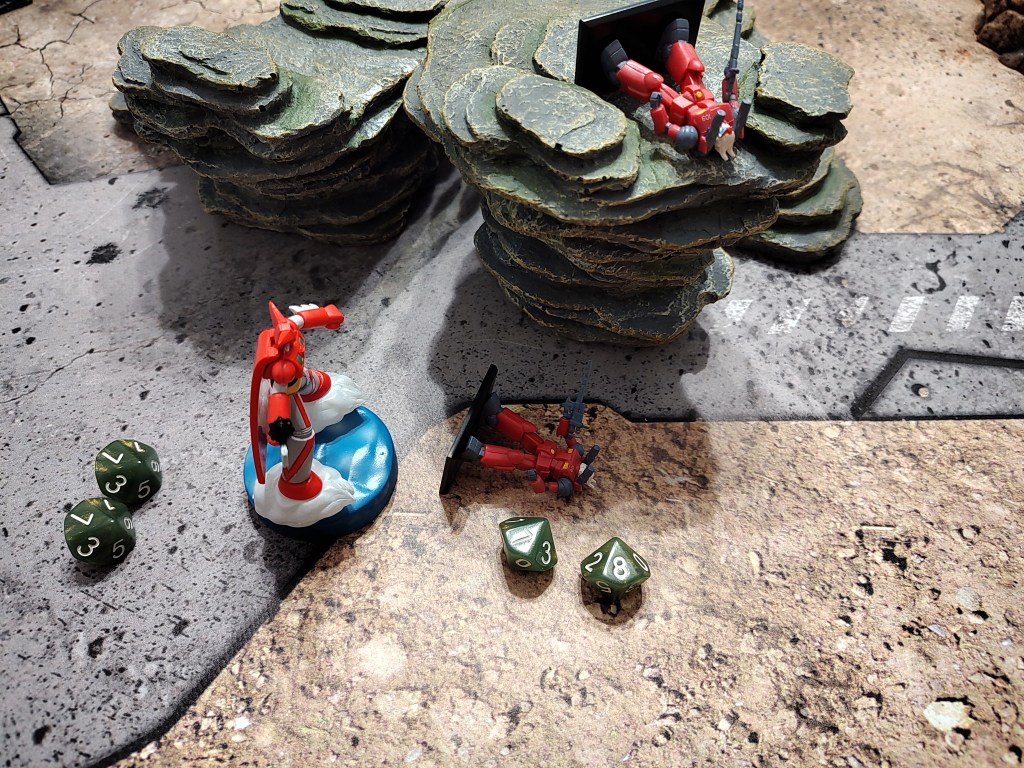
Kai’s Guncannon is up first and uses IDF on Mazinger for 500DMG
Mazinger activates and gains [M+1] from the Renowned Pilot trait. Mazinger then uses scrander cross to fly up to the high ground and return fire with photon energy beam scoring 6 hits blocked by 6 Momentum. [M-6]
Hayato’s Guncannon attacks with its artillery cannons with MIC into Mazinger for 3500 DMG

Now it’s Combattler V turn, Daisaku grants +1 Action which is used on Full throttle to take the high ground center field. Time to destroy some Guncannons! Finger Missiles deal 1200DMG and Super EM Spark with MIC deals 2400DMG and [M-1] to pass a failed save.
Amuro is up next his Gundam Beam Rifle with MIC scores 6 Hits into Combattler V who takes 2400 DMG and loses [M-1] to pass a failed save.
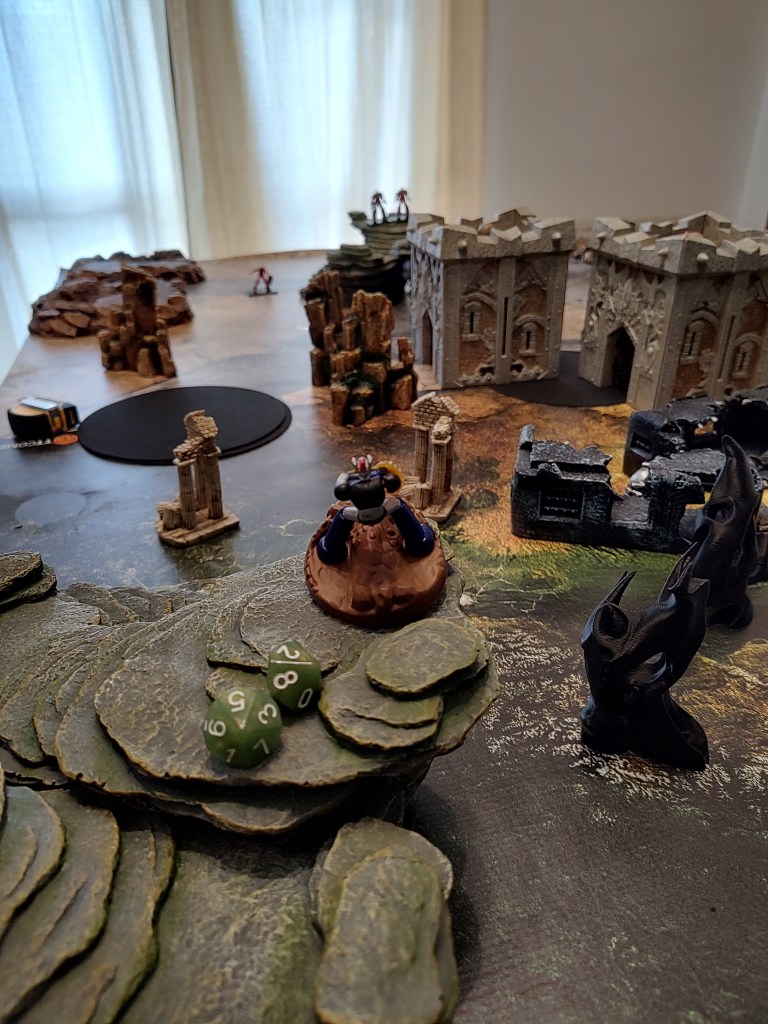
Musashi uses full throttle flank to move up the flank and stay out of LOS.
Casval’s Gundam take the high ground and RF Bazooka with MIC and Target Lock to deal 6 Hits, Combattler V loses [M-3] to drop it to 3 Hits and take 2400 DMG
End of Round Momentum is Gundams 1 | Super Robots 3.
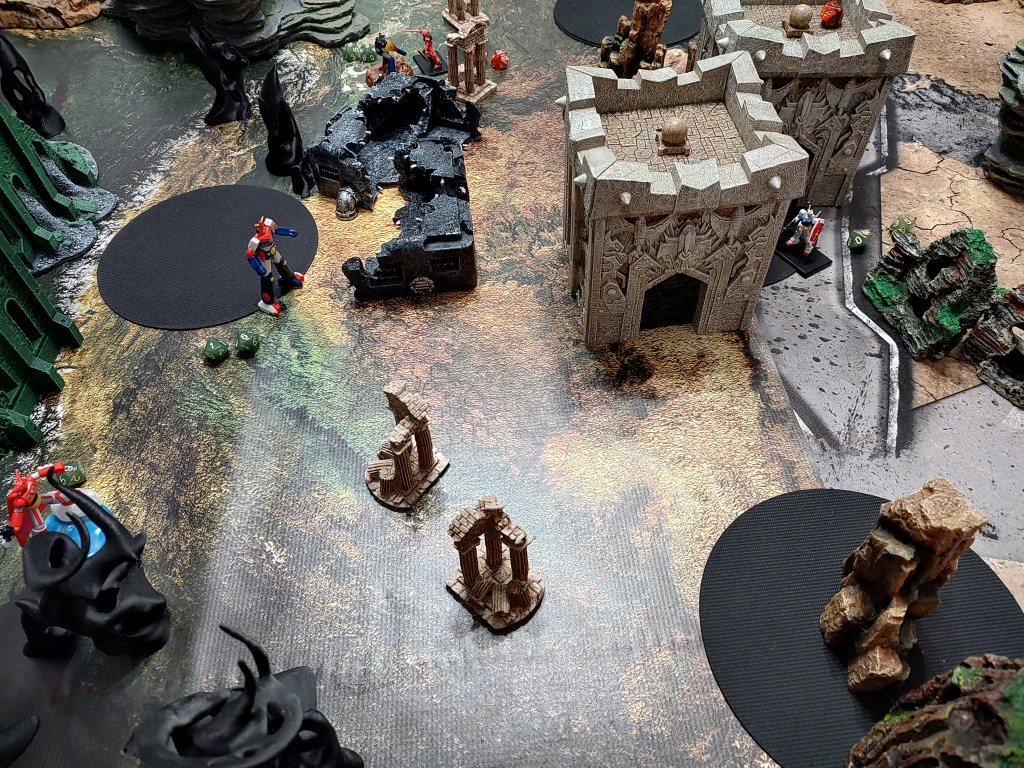
Round 2
Hyoma (Daredevil) + Chizuru (Fighting Spirit)

Hayato’s damaged Guncannon fires its artillery cannon with MIC into Mazinger who uses Ace Evade [M-2] for an Evade boost, he takes 3 hits for 1500 DMG. The Guncannon then drops out of LOS.
Mazinger activates and gains [M+1] from the Renowned Pilot trait. His Hot Blooded trait gives +1 Hit when activated due to Return Fire.
He attacks Char’s Gundam using Breast Fire with MIC 4 Hits for 1200 DMG but no failed Armor Saves, Photon Energy Beam lands 0 Hits thanks to Char’s Three Times as Fast Commander Trait and his Shield.
Char’s Gundam uses a Hyper Bazooka to attack Combattler V with 4 Hits. Combattler V uses [M-1] to Improvise and reroll dice and [M-1] to block 2 shots due Hyoma’s trait. 1 Hit gets through for 800 DMG.
Char then charges into Melee but Combattler V uses Overwatch with Big Blast which gets very lucky with crits and totals to 6 Hits. Char’s Shield blocks 1 Hit from each attack and he takes 2000 DMG.
For Char’s Melee he splits his dice into 8d10 ATK and 2d20 DEF.
Combattler V puts all of their 8d10 into DEF.
Char scores 7 Hits vs 4 Blocks . He deals 900 DMG and 3 Failed Armor Saves (+3000 DMG) destroys Combattler V. Chizuru grants [M+3] when destroyed.
Musashi declares Revenge on Casval’s Gundam

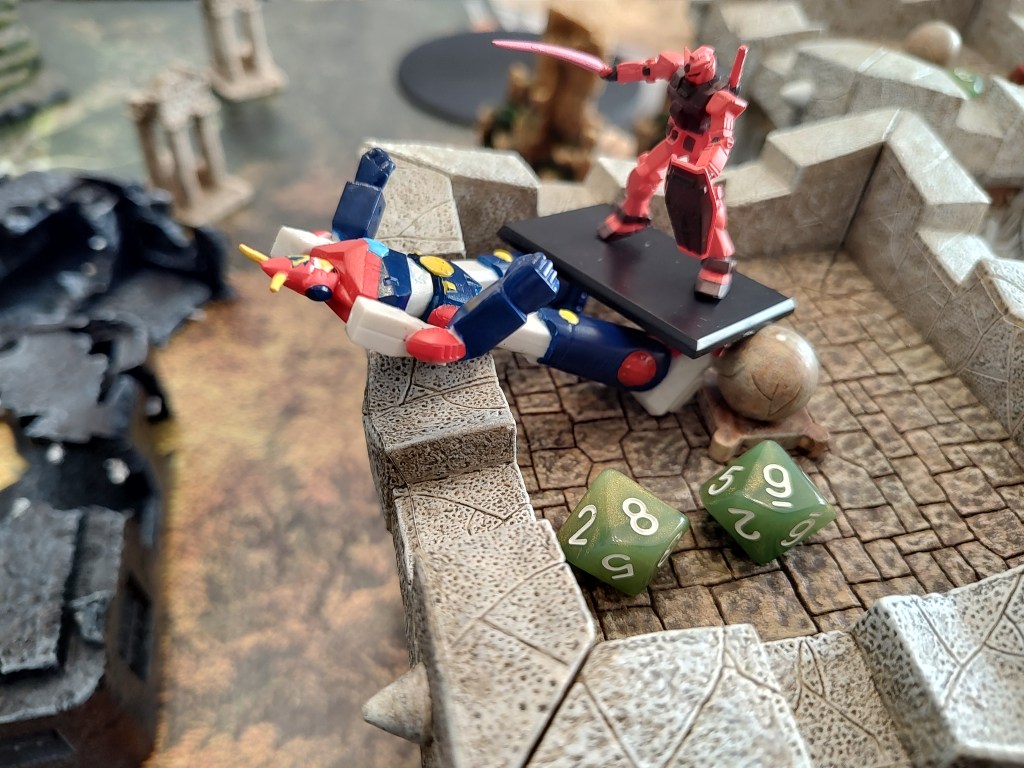
Musashi Getter is up, and briefly considers having a clash between the Three Times as Fast Commanders but realizes he needs to stop the other Gundam before it takes a turn.
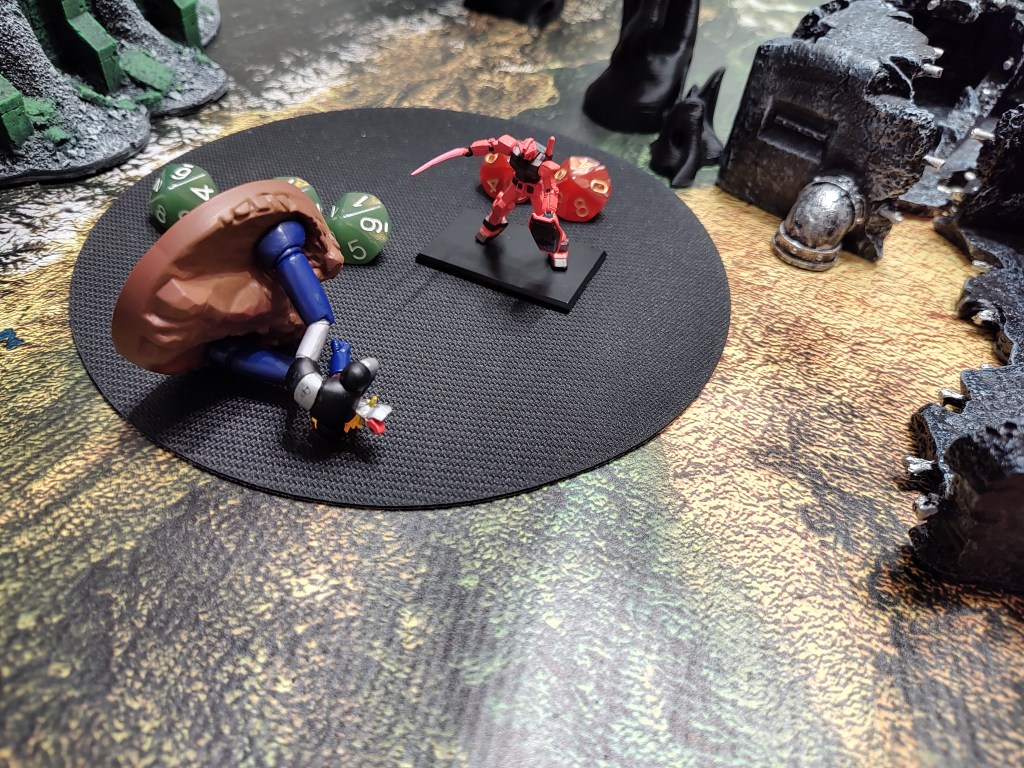
He takes the high ground and uses Tomahawk Boomerang with MIC and spends 3 Power on +200 DMG, the Shield is able to block 1 of the 8 Hits and Amuro takes 3500 DMG. Now for melee!
Getter ATK 10d10 DEF 2d10 Gundam DEF 4d10 ATK 4d10
6 Hits vs 5+1 Blocks [M-1].
Amuro’s Counterattacks with 5 Hits vs 2 Blocks, 900 DMG and [M-1] to pass a failed Armor Save and then 2000 DMG from the other 2 failed saves. Ouch, that didn’t go as planned.
Amuro’s turn, Renowned Pilot gives +1 Action, he uses two Focus actions for bonus hits in Melee.
Amuro ATK 10d10 DEF 0d10 Musashi DEF 7d10 Counter ATK 3d10
Amuro 7 Hits vs 4 Blocks [M+3]. Musashi’s counterattack 5 Hits vs 1 Block, Amuro uses Untouchable for +1d10 Blocks [2] and [M-2] . They fight to a stalemate.
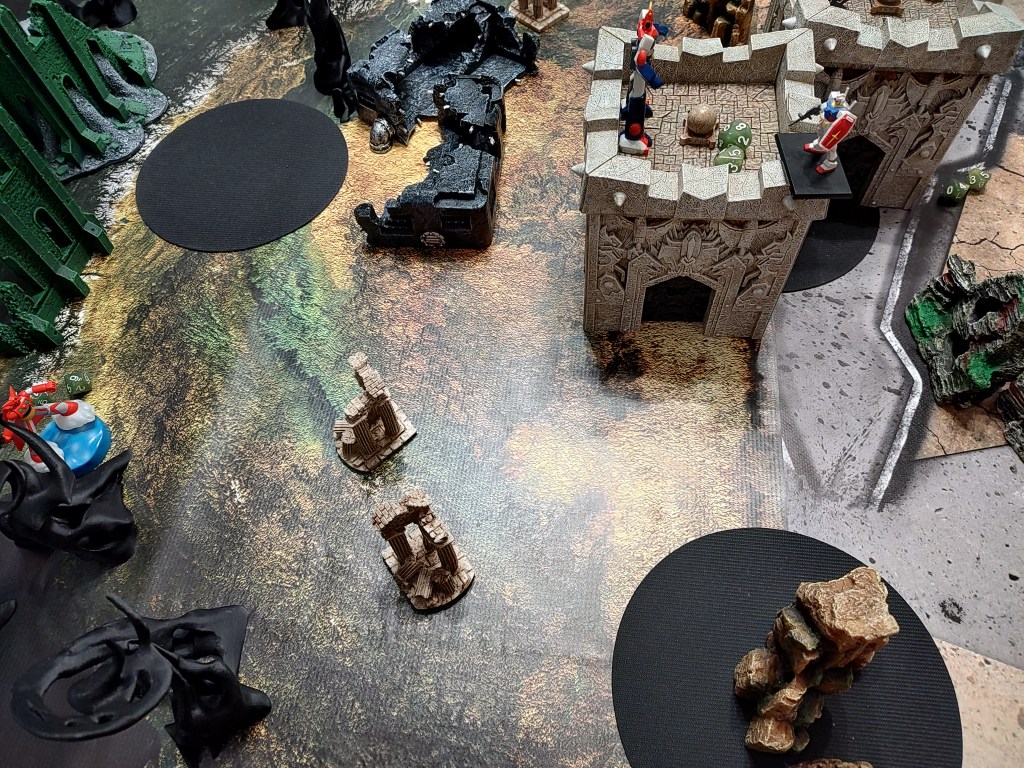
Kai’s Guncannon bombards Mazinger who is destroyed
End of Round Momentum Gundams 2 | Super Robots 1
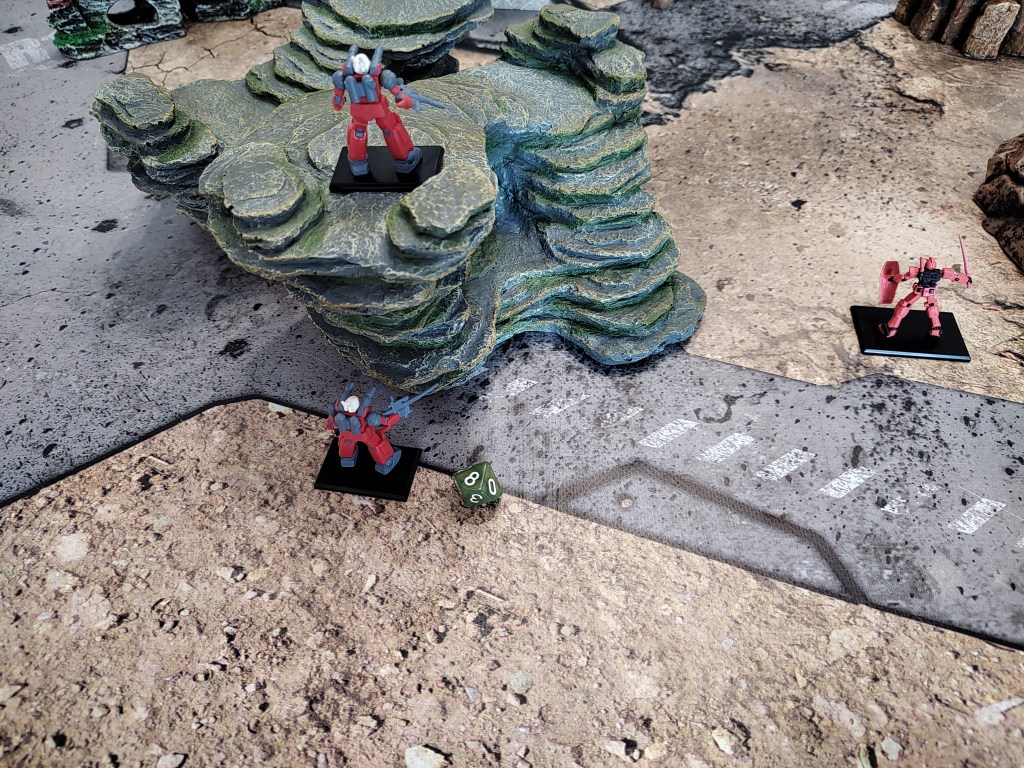
Round 3
Musashi is up first, his Guts trait gives [M+2],. He uses Power => DMG+100 on Getter Tomahawk and also Tomhawk Boomerang. He starts with melee.
Melee ATK 10d10 vs Amuro’s 8d10 DEF. 11 Hits vs 8 Blocks. Amuro doesn’t have enough Momentum to fully block the attack and so the 1200 DMG becomes 3200 after the Finishing blow destroying Amuro’s Gundam.
Char declares Revenge on Musashi.
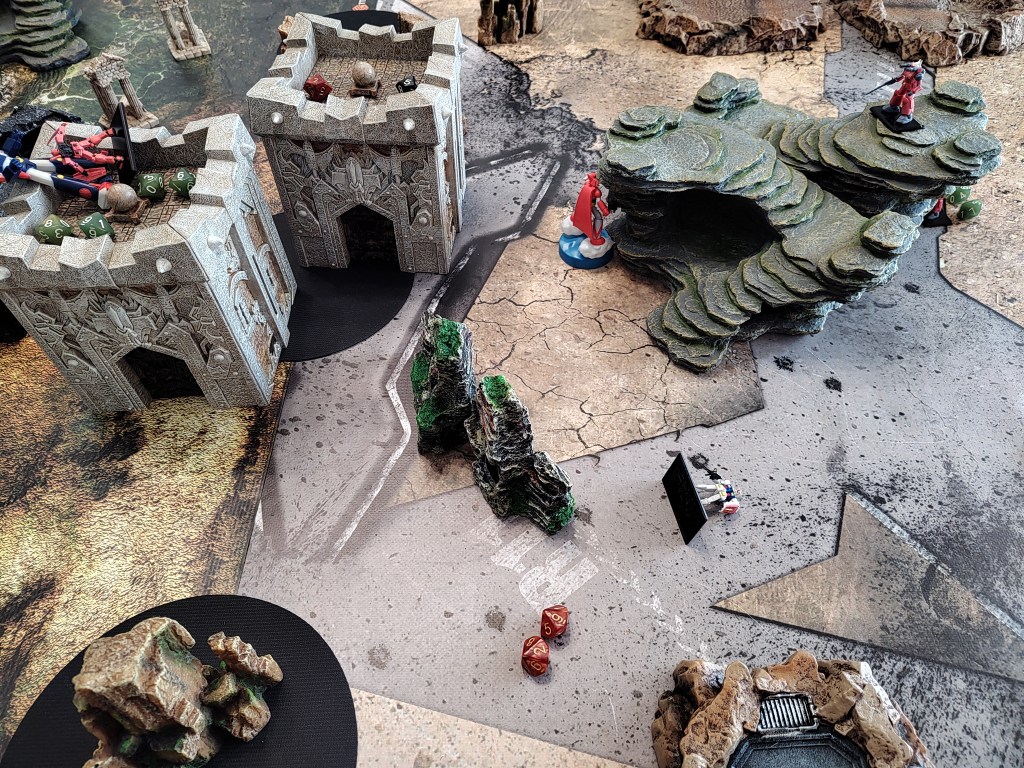
Musashi moves and throws a Tomahawk Boomerang blindsiding Char with 6 Automatic Hits +1 from Focus. With 1900 HP remaining and only [M-2] left they would still take 2000 DMG, and thus are destroyed.
He finishes his turn moving into cover blocking LOS from the high ground Guncannon.
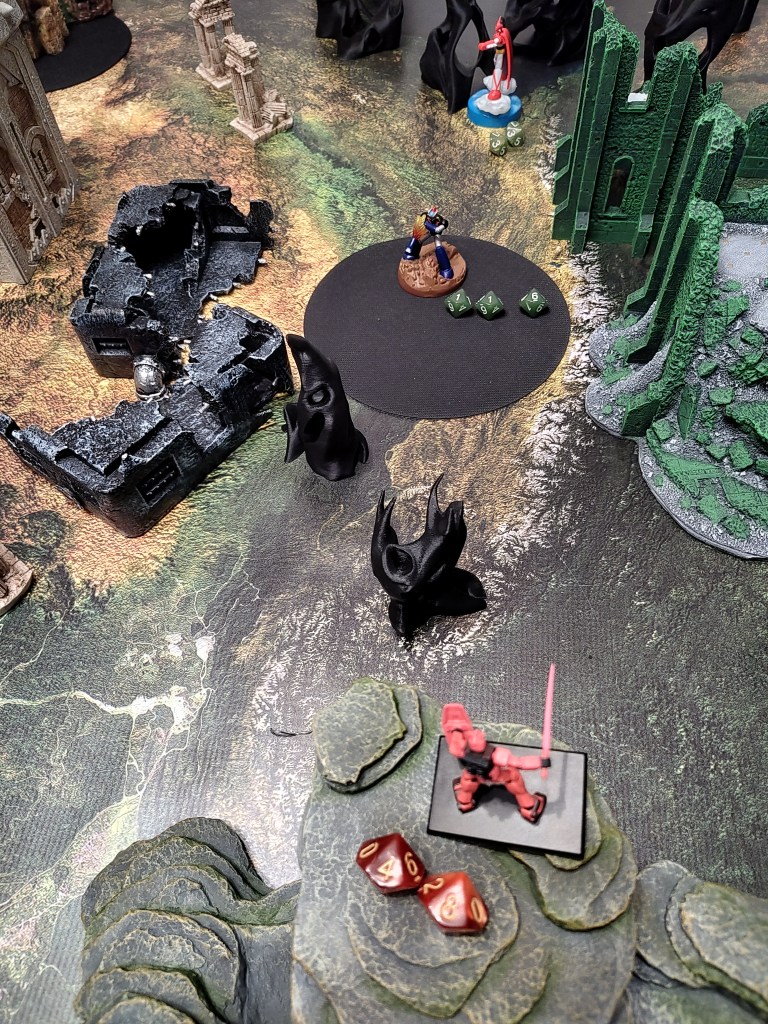
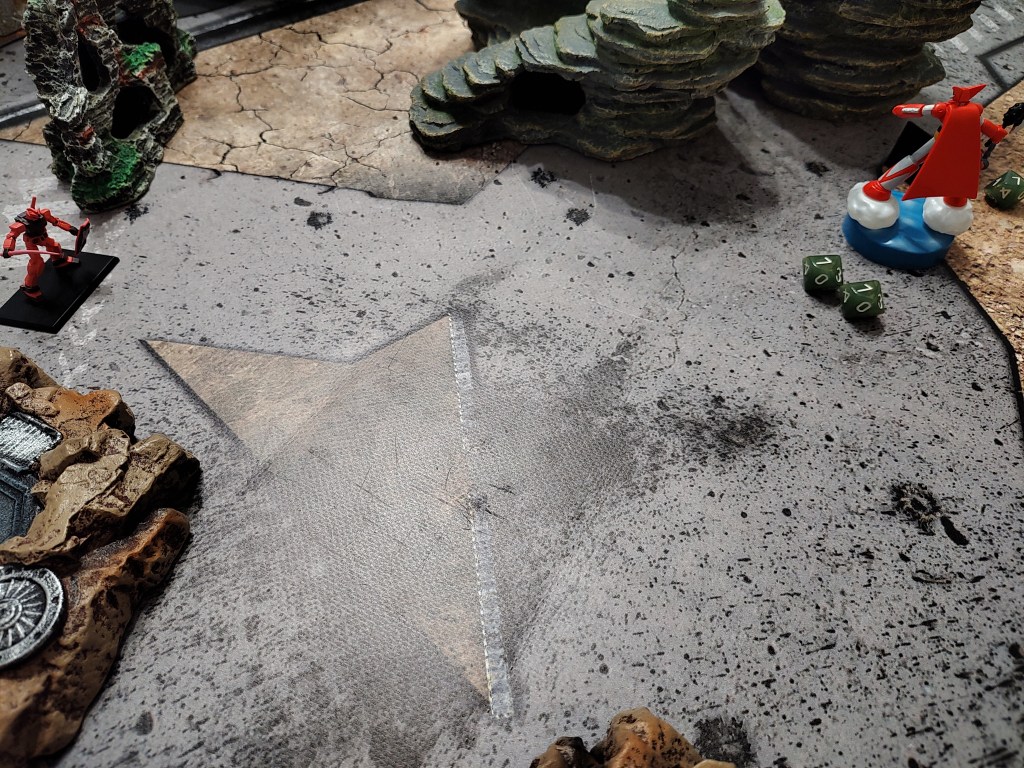
The 2x Guncannons are low on options and so move to get behind Getter, since they did not start their turn behind his rear arc they do not gain Blindside but can next Round if they seize initiative.
The first beam rifle lands 3 Hits and Musashi block 2 with [M-2] takes 300 DMG and passes the Armor Save.
The second beam rifle would have landed 5 Hits if not for Ace Evade, bringing it down to 2 Hits. Now for the moment of truth, if Getter can pass these two Armor Saves and then go first next Round he will likely sweep!
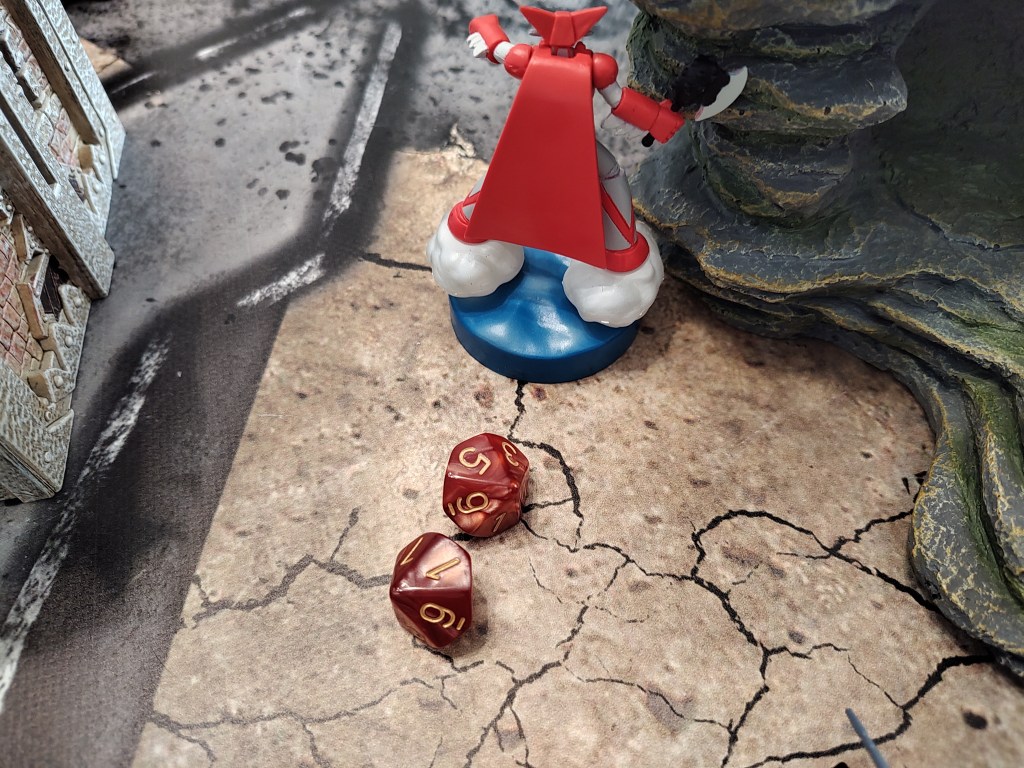
[1,5]
Fails em both lmao
Game 1 Victory Points
The players were using Simple Battle which gives VP based on destroyed Frame Level and Pilot Level, it also penalizes you for losing an Ace Pilot or a prototype (Frame 4+) unit. Players can get bonus points for destroying the enemy Commander or their Revenge target.
Gundam VP – 14VP
- Frame 13VP
- Pilots 8VP
- Commander Round 3 +3VP
- Lost a Critical Machine x2 -6VP
- Lost an Ace x2 -4VP
Super Robot VP – 8VP
- Frame 8VP
- Pilots 4VP
- Revenge +6VP
- Commander Round 3 +3VP
- Lost a Critical Machine x3 -9VP
- Lost an Ace x2 -4VP
Game Duration 30 minutes.
Such a close game! The players agree to a rematch using the SRW module with the exact same setup and traits. But first a quick mecha tactics after action report.
Mecha Tactics – After Action Report
Super Robot Player
Oh my goodness… I nearly snatched victory from the jaws of defeat. Musashi, my non-skilled Pilot really put in work this game. I realized early on that Toeizinger is a great heavy firepower unit but with the poor Evade and decent HP can go down pretty quickly. To be fair normally he’s fighting a Kikaiju, and not two skilled Guncannon pilots which are both specced out with Gunnery expert. My opponent is an expert with Guncannons to say the least.
My initial strategy was to try and wipe out the Guncannons, but both Mazinger and Combattler V failed to take a single one down and at that point they could hide behind terrain and IDF all day I realized I need to switch priorities but at that point it may have been too late.
I should have moved Mazinger into cover or out of LOS sooner. Also I was used to the upgraded Combattler V and forgot the base model is not as strong in melee. Lesson learned!
Last thing I’ll mention is that the game likely would have gone very differently if we had used Flawless Ace Evade, especially for Toei Mazinger who was getting bombarded with his terrible evade.
Gundam player
Woo! Team Guncannon brings home another victory! Well done to Kai and Hayato for holding down the fort, laughing in the face of the super robots and surviving till the very end!!
In all seriousness this was a very close game at the end, my opponent really had an amazing last turn with Musashi who killed both my ace Gundam’s in one turn. ”Char declares Revenge. Char is immediately destroyed” Ooof!
Both the Gundam’s did better than I expected in melee and I hope to continue that trend in the next game. One thing I am noticing and it’s too late to change it, is that having the Guncannon’s as exceptional Pilots while great offensively is a bit of a liability since it means MIC is free to use against them as well. 3x Basic Guncannons might be a better strategy, but honestly it’s more fun to bring the named pilots of the White Base together!
REMATCH
In this game the player’s are using the SRW module which doubles all units HP but raises the cap on Armor Saves to 5 from 3. This module makes Mobile Suits more agile and makes Super Robots more resilient and able to keep on fighting by rewarding them for standing out in the open. If playing with Warships they arrive with weapons charged and ready to fire.
It also provides secondary objectives to score Victory Points at the end of each Round.
- Destruction – +5 VP if you destroyed a unit this Round
- +5 VP each Round your opponent has [M<5] while you have [M>=5]
- Survival – +5 VP each Round one or more units you control are <50% HP.
- +10 VP each Round if at least half of your units are at full HP.
- Control +15 VP each Round yours is the only unit within 8” of the battlefield center
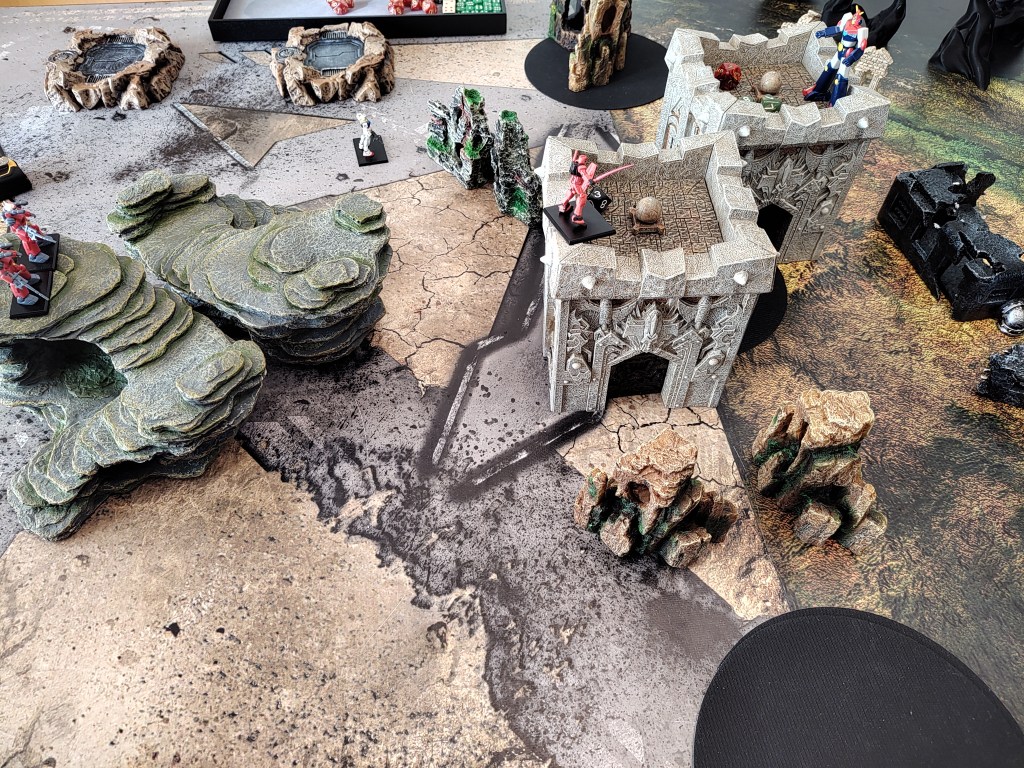
Round 1
Combattler V Pilot Team – Juuzo (Marskman) + Daisaku (Powerhouse)
Mazinger is up first and gains [M+2] from Renowned Pilot and Fearless. He then challenges the Guncannon forcing them to attack one another, and if destroyed yields double VP.
He uses Photon Energy Beam into Guncannon, but this time without the Return Fire bonus from Hot Blooded. Power+1 PEN. 6 Hits vs 4 Blocks [M-4] = 2 Hits and [M-1] pass a failed Save the Guncannon takes 800 DMG.
Guncannon returns fire with artillery scoring 6 Hits for 3000 DMG.
Combattler V is up next Daisaku gives [M+1] and this time goes for a long range approach, Super EM Spark with MIC lands 1 Hit against our Ace Evade [M-1] Newtype Pilot, while Finger Missiles hits once as well. Amuro takes 600 DMG. Combattler V then pulls back to the control point to capture it for [M+1].
Amuro is up next and fires his hyper bazooka at Combattler V, [M-1] Ace Evade allows him to dodge all 2, Cover takes a 3rd hit, then the last two from Make it Count deal 1600 DMG and [M-1] to pass a failed armor save.
Musashi uses Red Line and rolls +16″ jetting up to the midfield, throwing a Tomahawk boomerang at Amuro with +200DMG from Power, [M-1] deals 1500 DMG.
The 2nd Guncannon fires its artillery cannons with MIC landing 6 Hits [M-2] Blocks 2 and Mazinger takes 2000 DMG. Guncannon remains where it is to capture the point for [M+1].
Casval’s Gundam moves up and fires its Hyper Bazooka at Mazinger, 5 Hits, [M-5] to block all of them. Char then captures the point for [M+1].
- End of Round Momentum Gundams 5 Super Robots 5
- End of Round VP from SRW Module
- Gundams Destruction +0VP Survival +0VP
- Super Robots Destruction +0VP Survival +0VP
Already a much different game by having the Super Robots playing defensively instead of ultra-aggressively.
Round 2
Combattler V Pilots – Kosuke (Mechanical Genius) + Daisaku (Powerhouse)
Mazinger Is up first and takes the [M+1] from Renowned Pilot and outside of Cover uses Fearless for a double rally regaining 1300HP. Mazinger is eager to leave his high ground perch since it will have no effect on Newtypes. He starts off with a Photon Energy Beam with MIC and +100 DMG from Power against the visible undamaged Guncannon. 3 Hits and 2 failed Armor saves deals 3500 DMG.
Now for Char, knowing his high Evade and up to 5 rerolls Koji switches over to his high hit weapons, the Rocket Punch and Drill Missiles. The Drill Missiles deal 2 Hits no failed saves and so 600 DMG. Koji uses [M-2] to turn Rocket Punch into Iron Cutter with higher PEN and MIC for bonus hits. 4 Hits results 1600 DMG and 2 failed Armor Saves for Char who burns [M-2] to avoid massive damage.
Time to return the favor, Char activates and gains [M+1] from The Red Comet and fires its Bazooka with MIC at Mazinger who uses Improvises and Ace Evade [M-3] and is hit 4 times for 3200 DMG.
Char moves into Melee and gets hit by Southern Cross Knife on Overwatch for 800 DMG then attacks Mazinger.
Char 10d10 ATK 0d10 DEF Mazinger 4d10 DEF 0d10 ATK. 4 Hits vs 3 Blocks [M-1] Stalemate. With the roll for High Impact Melee both foes are stuck in melee.
Musashi is up next, he moves within 16″ and then uses Power+200DMG and MIC to drop 6 more hits on Amuro, whose Shield blocks 1 Hit and he takes 2500 DMG.
Musashi then moves backward luring Amuro forward. (Amuro saves M2 to use for Ace Evade for himself or Char later)
Amuro activates and uses Renowned Pilot for +1 Action. Rather than taking the bait he will play to the MS strengths and use hit and run tactics, with his two actions he fires his beam rifle and then hyper bazooka with MIC. Out of Momentum Musashi is hit 3 times with the beam rifle and 3 times with the Hyper Bazooka after rerolls and MIC, cover blocks 2 hits of the beam rifle and 1 hit of the bazooka bringing the damage to 300 and 1600 with a failed save from the beam rifle for another 1000 DMG.
(Amuro had consider using Make it Count to double tap with the bazooka since Musashi can’t use Ace Evade but decided against it since he has a native Evade reroll due to his Commander Trait, plus they are already short on Momentum). Amuro uses the Hit & Run ability from the SRW module to move away 5″ then use his remaining movement to capture the central point for [M+1].

Combattler V is up next, uses Kosuke for DMG+100 and Daisaku for [M+1], Fearless for another [M+1]. He flies up to the high ground (contesting the center for high VP Control the Battlespace Objective) and fires on the wounded Guncannon.
Super EM Spark with MIC does 5 Hits for 2000 DMG and 2 failed Saves leaving them with 100 HP remaining. They are then finished off by Combattler V’s finger missiles.
The last Guncannon activates and fires on Combattler V who uses Ace Evade [M-2] with both weapons using gunnery expert on the cannons (2 Hits) and MIC on the beam rifle (4 Hits). The cannons deal 1000 DMG and the Beam Rifle does 1200 DMG plus 2 failed Saves for +2000 DMG. Guncannon then uses Hit and Run to return behind LOS cover.
- End of Round Momentum Gundams 4 Super Robots 2
- End of Round VP for SRW Module
- Gundams Destruction +0VP Survival +0 VP
- Super Robots Destruction +5VP Survival +5 VP
Round 3
Combattler V Pilot Team – Hyoma (Daredevil) + Daisaku (Powerhouse)
The Gundam side is up first and the player deliberates between activating Char or Amuro first. They reason that with Char’s evade rerolls and already being in melee with lower DMG that Char is most likely to survive an entire turn of shooting an so activate Amuro first.
Unfortunately, Combattler V isn’t visible from Amuro’s position, he uses Renowned Pilot for +1 Action to full throttle up the central terrain but rather than blast Combattler V (who can rely on Hyoma’s pilot trait) Amuro instead uses the high ground to strike at Getter Robo with tactical advantage and MIC leading to 6 Hits from the beam rifle for 1800 DMG and 3 failed Armor Saves for 3000 DMG. Getter Robo barely survives the turn.
Then Amuro charges Combattler V but is caught in Overwatch with a Big Blast and Atomic Burner, after NT rerolls and Shield blocks that is 0 hits from the Big Blast and 3 Hits from the Atomic Burner for 300 DMG.
Amuro Melee 7d10 ATK and 3d10 DEF Combattler V Melee 4d10 DEF and 4d10 Counter ATK
Amuro 6 Hits vs 2 Blocks, 1200 DMG and 3 failed Armor Saves +3000 DMG
Combattler V counterattack 3 Hits vs 2 Blocks, Amuro takes 300 DMG and is prevented from dealing a Finishing Blow and more importantly knocks him out of Engagement range.
Combattler is up next and uses Fearless to rally and recover 700HP, and Daisaku for+1 Action hoping to obliterate Amuro and the Gundam who loses [M-3] on Ace Evade.
Big Blast with MIC scores 6 auto-hits but Amuro evades all the rapid fire attacks, and takes 2400 DMG.
6 Hits from the Super EM Yo-Yo for 1200 DMG and [M-1] to pass a failed Armor Save. It’s Finger Missiles hit for 1200 DMG.
With >1000 HP remaining Combattler has no choice but to try and finish Amuro in Melee, a dangerous gambit.
Combattler V Melee ATK 10d10 DEF 0d10 Amuro DEF 5d10 ATK 3d10
Combattler V gets 8 Hits on ATK, while Amuro luckily rolls 5 Blocks +2 from the Shield, he takes the 300 DMG and soldiers on.
Counterattack gets 3 Hits, plus MIC for 5 Hits dealing 1500 DMG and miraculously passes all but 1 Armor Save. Combattler’s fist knock Amuro out of Engagement range again which is great news because a Guncannon is up next.
Kai’s Guncannon moves fires the cannons with 3 Hits for 1500 DMG and the beam rifle with MIC for 5 Hits dealing 1500 DMG failing 3 Armor Saves results in the destruction of Combattler V.
Musashi declares Revenge on the Guncannon.
Mazinger is up next, renowned Pilot gives [M+1] and Fearless gives [M+1] starting with melee ATK 6d10 + MIC vs Char’s DEF 4d10 and Counter ATK 4d10
Mazinger 7 Hits vs 5 Blocks [M-2] +2 Blocks
Char 5 Hits dealing 1500 DMG and [M-2] to pass 2 failed Saves, Finishing Blow deals another 1000 DMG
After Melee the two opponents break away.
Mazinger uses Breast Fire which Char completely avoids, then Drill Missiles with MIC, Focus and +100 DMG from Power, dealing 5 Hits and 1 failed armor save for 2500 DMG, and a Rocket Punch for 400 DMG.
Mazinger retreats back 8″ so Char cannot enter melee without burning an action.
Char is up next, rather than take the bait, rush into melee and get broadsided by the waiting Getter, he instead takes the high ground and fires his bazooka at Mazinger with MIC 4 Hits does 3200 DMG.

Musashi is last this turn, and gains [M+2] thanks to Guts and [M+1] thanks to Fearless, rather than strike at the enemy Commander he decides to go after his Revenge target. Using his superior movement he moves to midfield, and the Tomahawk boomerang with MIC finishes off Amuro’s Gundam (Char declares Revenge), then he uses Redline to move closer to the Guncannon to wreak vengeance.
- End of Round Momentum Gundams 1 | Super Robots 10
- End of Round VP from SRW Module
- Gundams Destruction +5VP Survival +0VP Control +0VP
- Super Robots Destruction +10VP Survival +5VP Control +15VP
Round 4
Musashi is luckily up first, he moves fast throws a tomahawk boomerang and finishes off the Guncannon in melee and completes Revenge (+4VP)
Char wishes he had gone first this round, since Challenging Mazinger would have been easy VP. Char fires the bazooka at Mazinger for 8 Hits blocked by [M-8]. Char goes into melee and deals a staggering 12 hits vs 2 Blocks finishing off Mazinger.
- End of Round Momentum Gundams 5 | Super Robots 3
- End of Round VP from SRW Module
- Gundams Destruction +10VP Survival +0VP
- Super Robots Destruction +5VP Survival +5VP
Round 5
Char luckily wins initiative. He uses his bonus action for Redline to move an extra 10″ gets far enough on the midfield to get LOS on Musashi’s Getter-1. He fires the beam rifle, after rerolls there were 2 hits blocked by [M-2]. He uses Make it Count to fire again [M-2], this time there were 4 Hits, with only 1 Momentum left the DMG is enough to destroy him. (Revenge+5VP)
The player rolls an Armor Save just to see, and got a 7,9,10. Oh well!
Char uses the last of his movement to get within 8″ of the battlefield center.
- End of Round Momentum Gundam 4 | Super Robots 3
- End of Round VP from SRW Module
- Gundams Destruction +5VP Survival +0VP Control +15VP
- Super Robots Destruction +0VP Survival +0VP Control +0VP
Victory Points
The players were using Simple Battle which gives VP based on destroyed Frame Level and Pilot Level, it also penalizes you for losing an Ace Pilot or a prototype (Frame 4+) unit. Players can get bonus points for destroying the enemy Commander or their Revenge target. The SRW Module also gives secondary objectives worth a lot of VP to pursue.
Gundam VP – 24VP + SRW 35VP = 59VP
- Frame 13VP
- Pilots 8VP
- Destroyed Enemy Commander Round 5 +5VP
- Revenge +5VP
- Lost a Critical Machine x1 -3VP
- Lost an Ace x2 -4VP
- SRW Mod – Destruction – 0+0+5+10+5 = 20VP
- SRW Mod – Survival – 0+0+0+0+0 = 0VP
- SRW Mod Control the Battlespace – 0+0+0+0+15 = 15VP
Super Robot VP – 6VP + SRW 50VP = 56VP
- Frame 10VP
- Pilots 5VP
- Revenge +4VP
- Lost a Critical Machine x3 -9VP
- Lost an Ace x2 -4VP
- SRW Mod – Destruction – 0+5+10+5+0 = 20VP
- SRW Mod – Survival – 0+5+5+5+0 = 15VP
- SRW Mod Control the Battlespace – 0+0+15+0+0 = 15VP
Game Duration 70 minutes.
Mecha Tactics – After Action Report
Gundam player
I’ll start by saying I think these two battles were the most fun game we have had this entire year. We both got to use some favorite units and the gameplay was intense trying to figure out how to maximize actions for each turn and then figure out a way to save your units to save another Round.
I have to say it was so much fun replaying the exact same match, learning from mistakes, and seeing what it looks like with an optional module placed on top which absolutely changed the game. The SRW module doesn’t change tactics much for Mobile Suits, it just makes us more mobile lol, but for Super Robots they are so much more durable thanks to Fearless. Redline is also a lot of fun, since it puts a lot of risk into seeing if you can move far enough.
So even though I tabled my opponent I almost lost on VP. If you noticed I didn’t score a lot of VP on secondaries, mostly because of habit. The two of us are used to intentionally taking hits in modules that double HP so we missed out on some easy points from keeping units at full HP. Whoops!
Same thing with Momentum, we’re used to burning Momentum to prevent high damage attacks (generally across 5 rounds its more efficient to burn Momentum against high DMG weapon like a Bazooka even if it won’t kill you) but if we thought more about scoring VP there were several times where it would have been better to save the Momentum and take the damage to dip below 50% HP. Lesson learned!
We played a couple more games using the exact same setup and I gained a lot more VP after I got the hang of the new secondary objectives, but this game was by far the best.
Super Robot Player
I was suprised I nearly won this one even thought my entire roster was destroyed. We had to look over our notes and photos a few times during the writeup to make sure we didn’t miss any Victory Points hahaha!
For this game I played against the grain by playing very defensively early on. Since my army had a pretty strong melee / close range emphasis it meant a couple units couldn’t maximize their turns, but I was curious if I could make it work anyways. Getter performed better than I expected being a melee unit, he did a great job as a skirmisher thanks to the 3x as Fast trait. Mazinger spent more time in cover and having him around a few more rounds absolutely helped. I also really appreciate the change to some of the close range weapons to be auto-hit since Casval’s Gundam having a high evade + rerolls was really tough so it was nice having a few weapons in my loadout to deal with that.
I really like the SRW module since it gives me a lot of breathing room as a Super Robot by having far more HP and the chance to rally and recover HP later. The double HP is nice since it gives more interactions in melee where you can intentionally take a hit in order to strike back at your opponent, which was especially use for the Mobile Suits who are now strong enough to take a few hits in melee then get a beam saber slash in on counterattack.
The VP for this module went through a few revisions, initially destruction was going to mirror one of the Defend the City rules where you gain VP for dealing 1000+ DMG to a unit and can gain double VP if you hit two units in one turn. It’s a good rule but we realized earlier that it would be best to have all the secondaries trigger at the end of the Round instead of having to track it during the battle, since the SRW module already adds enough things to remember while playing. So that’s why in this game you see us hitting each other hard very often when we really should have prioritized taking 0 damage or saving Momentum.
Overall though we really like the changes to VP scoring for the SRW module. We wanted them to discourage focus firing on only a single unit, that way you see units break off and have their own duels, instead of 3 units firing on one unit for instance. We accomplished this with the VP for Survival where you get a lot of VP if you keep a few units at full HP, so it encourages your opponent to split up their attacks and try to damage several units. Not just in Round 1 either, since a Super Robot can potentially rally and return to full HP. Then on the flip side of things it rewards you for having units that are badly beaten but still fighting.
We put the new VP to work in the next few games in the series, and unfortunately this was the only game I won but we had a blast playing with it. For me personally, I need to remember to hold the center point for free points rather than chase down the enemy.
