Below are some photos of terrain layouts we’ve used when running the Co-op Mission Packs for Federation and Zeon. These are only photos for the desert maps and city maps.

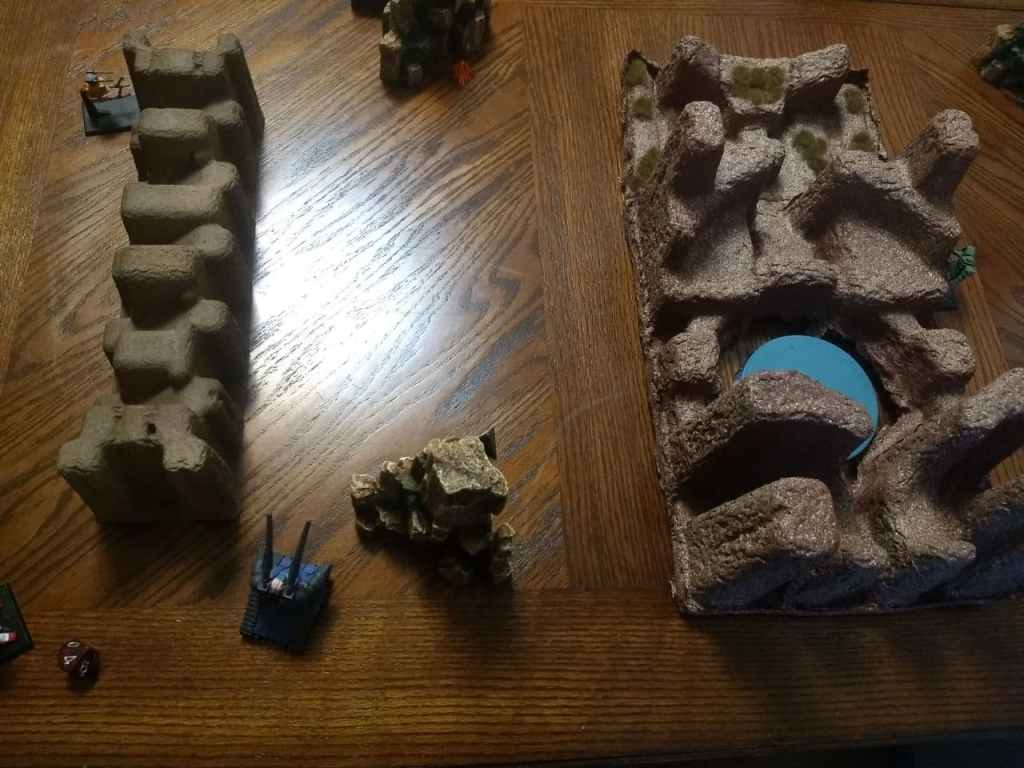
We used this layout for Mission 2 & 3 using some texture spray painted carboard from packaging with some flocked desert grass. There are also 4 rock formations from some relatively inexpensive aquarium objects. The center object with the oasis makes for a nice last stand when running the Zeon campaign and is a great time to use the Coordinated Fire Command. Since I haven’t painted a GM orange yet, the orange Ball Type-K was a substitution for a GM Light Armor.
Both the Federation and Zeon games had zero casualties Missions 1-3.

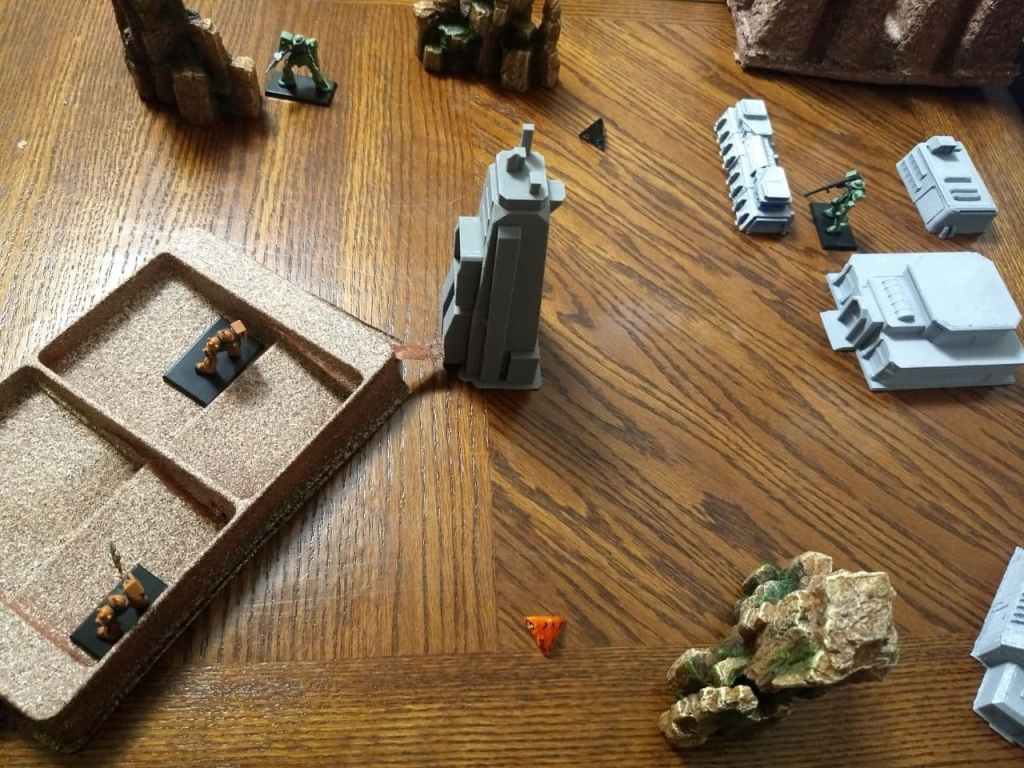

Reused the desert terrain from Missions 2 & 3 then added in some militarized buildings used in Mission 1. The key for this map is to ensure the Entry tunnel does not open straight into the cavern, keep it tilted to ensure there’s no Line of Sight between the two forces when starting. This map generally leads to both sides taking shots from each other from afar but the Zeon team deployed dangerously close to Rapid Fire range.
The Zeon team started too close to the entrance and underestimated how durable the GM Ground Types were. They also did not have enough momentum to weather the storm of shots being sent back at them. A bold strategy had a Zaku Desert Type ambush behind them in the entrance emerging from the sand. While it took out the GM Sniper, it was only due to some extremely, extremely lucky rolls that it survived the retaliation from a GM Ground type. Survived with 0 casualties but each unit took heavy damage after running out of Momentum and defensive Commands.
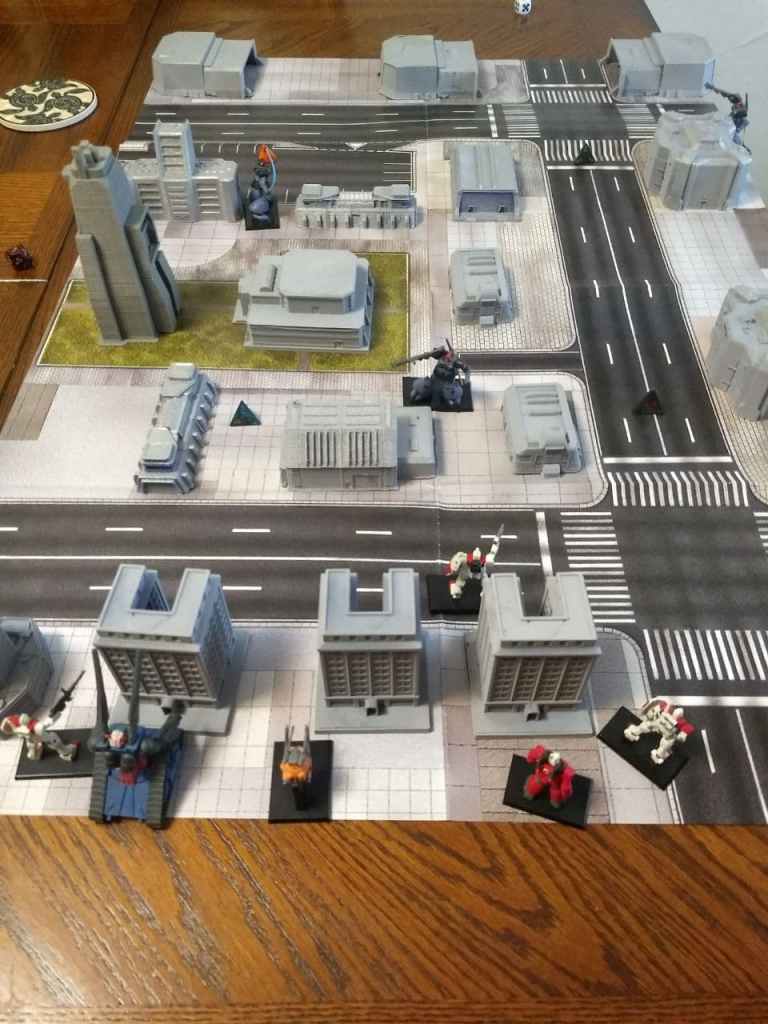


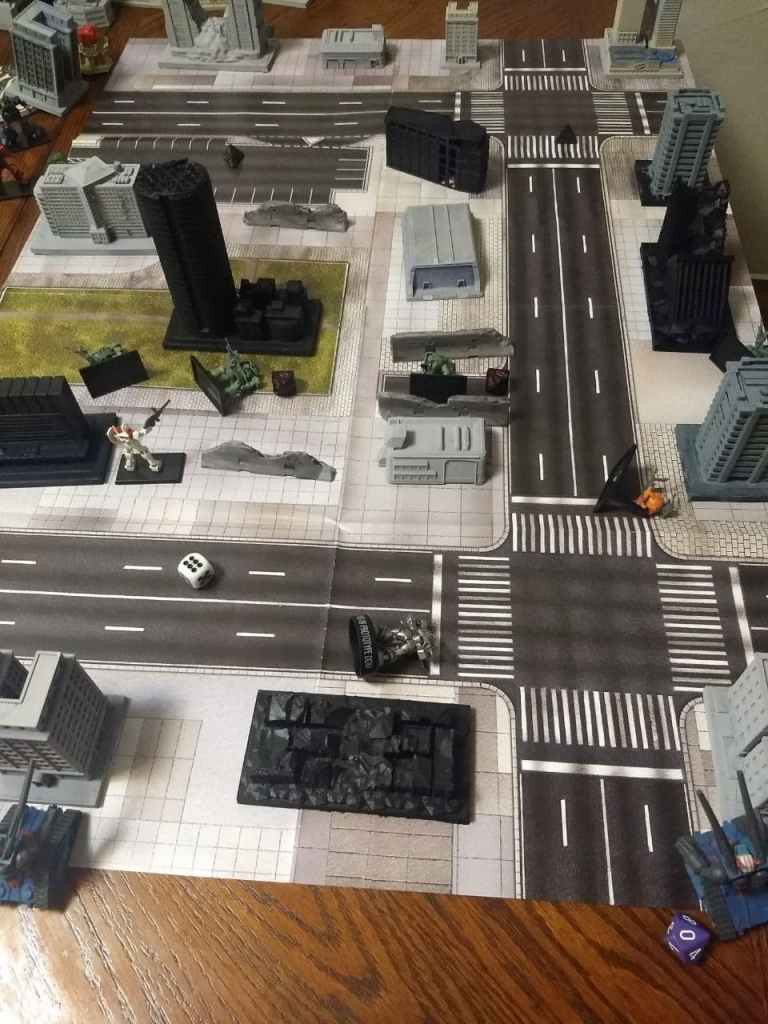
Mission 5 will have the same layout as Mission 1, we used 3d Printed militarized style buildings for Mech Hangers, Facotories and maintenance shops along with some C2 buildings, barracks on one end and hangers on the other. The mat is from Drop Zone Commander.
For the Federation this was one of the most fun missions since the Doms engaged in constant hit and run moves, draining the Federation’s momentum. They had to focus fire on each Dom to win this mission. Still a flawless run with zero casualties.
On the Zeon side the Dom is debuted and sadly is the first casualty for the Zeon campaign, the rest of the battle goes well although the Guncannon’s nearly wipe out the Desert Zaku’s on several occasions. After the mission they spend 20 Acquisition points to fully repair the Dom and thankfully the pilot survived.

With Mission 4 & 5 meant to be a culmination of the first arc, Mission 6 is meant to be reset, an easier mission to let a beleaguered team recover some acquisition points and prepare for the next arc. On the Federation side it was a bit easier since they wanted to avoid damaging any buildings which made it difficult to effectively use all the indirect fire units they had available in their army, so instead they had to rely on their GMs to root out the enemy. The Zaku II Ace in this mission was quite a dangerous foe and survived the entire mission.


Mission 7 was the start of the end for the Federation campaign. Emboldened by a flawless record they let their powerful units sit out to get extra HP repaired and brought in their less costly older units. Unfortunately for them the GM Light Armor and Pilot were slain by the Dom Hi-Speed Experimental Type while both Guntanks were destroyed by an ambushing Camouf, fortunately those pilots survived. A single GM was the survivor for this mission. On the Zeon side Mission 7 was a lot of fun, both the Dom and Zaku Cannon were the MVPs and the Gouf made its debuted and did splendidly.


Mission 8 was a blast on the Federation side, the Guncannon of all units took out the Gouf Custom but not before it took out the GM Cold Districts (and took out another pilot). The ambush wasn’t too difficult and each unit had a moment to shine.
For the Zeon side Mission 8 was a tough one, with a Dom Tropen, Dom Barrage they were able to avoid most of the shots of the Guntanks without losing too much momentum. The Gouf and Desert Zaku came in as cleanup. The Dom barrage and Gouf went down this mission but thankfully both pilots survived, the team opted to fully repair both units and continue.
Mission 9 & 10 the Federation team limped along with a GM Nightseeker II (using a GM Quel as a proxy) and a Guncannon Mass Produced repaired with their remaining acquisition points they barely survived Mission 9 then were wiped out in Mission 10.
For Zeon Mission 9 spelled doom for the Zeon team. While off to a good start, the Gouf took out the enemy Commander but was not able to withstand the firepower of 3x GM Command’s and went down. The horde of GM’s slowly approached and while the range and movement of the remaining units whittled them down, eventually they got close enough to land some lethal shots. Both Dom’s died due to penetrating shots and neither pilot survived. The Desert Zaku was the only survivor this map. Strapped for points they repaired as best they could and went to Mission 10 and didn’t make it past round 2.
Federation Campaign Pilots
Ran – Level 1 Elusive Trait – MS: GM Light Armor. KIA Mission 6
Kain – Level 2 Defiance Trait – MS: GM, Guntank, Guncannon Mass Produced, GM Nightseeker II. KIA Mission 10
Alis – Level 2 Renowned Pilot Trait – MS: GM, GM Command. KIA Mission 9
Cetra – Level 2 Gunnery Expert Trait – MS: GM, Guntank, Guncannon Mass Produced. KIA Mission 10
Vikram – Level 1 – MS: GM Cold Districts. KIA Mission 8
Zeon Campaign Pilots
Claude – Level 1 Close Combat Expert Trait – MS: Zaku II, Zaku Desert Type, Gouf. KIA Mission 9
Jett – Level 2 Practiced Professional Trait – MS: Zaku II (Magella Cannon), Zaku Desert Type (Long Barrel Machinegun). KIA Mission 10
Stuart – Level 1 Mechanical Genius Trait – MS: Zaku II (Magella), Zaku Cannon, Dom Barrage. KIA Mission 9
Maya – Level 1 Unwavering Loyalty Trait – MS: Zaku II, Dom, Dom Tropen. KIA Mission 9

One thought on “[MS] – Photos for the Gundam Co-op Mission Packs”